11 Simple Steps to Build a Monthly Budget Tracker with Microsoft Excel
Microsoft Excel stands out as an accessible tool for tracking basic expenses, provided you commit to a consistent input method. Notably, you can achieve a significant amount with minimal prior knowledge or experience in Excel. By establishing a simple template or framework, you can begin customizing it to extract the information you need.
How to Manually Create a Monthly Budget Tracker in Excel
Step 1: Set Up a New Workbook and Create a Sheet for Income and Expense Streams
Starting from scratch means it’s advantageous to compile a list of anticipated income and expenses. You can create this list either broadly or with more detailed categories.
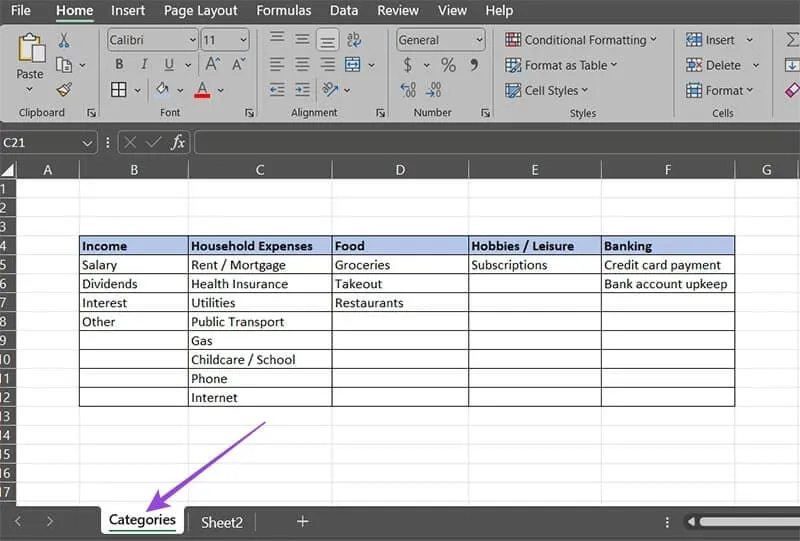
Here’s a concise overview of potential categories you might include, which can be recorded in the first sheet titled “Categories.”
Step 2: Add a New Sheet for the First Month
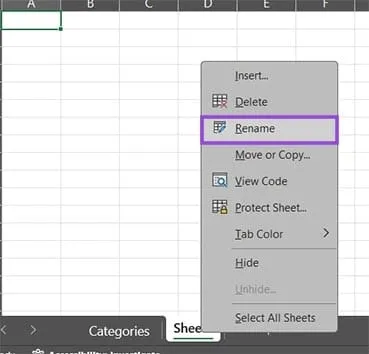
Select a new sheet within your workbook and rename it to reflect the specific month and year you wish to monitor.
Step 3: Outline Your Categories
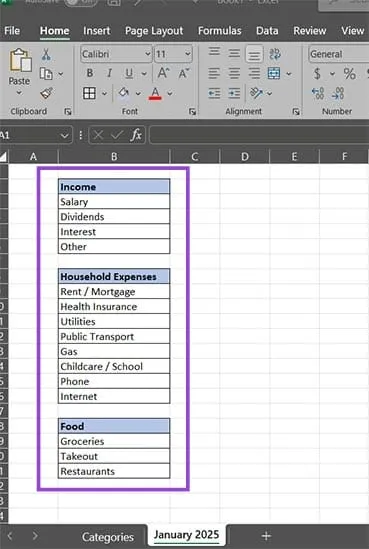
Develop two smaller tables to differentiate between income and expenses, listing the categories vertically underneath one another.
At this stage, you have the option to either summarize your budget for each month in a simplified manner or create a more intricate table that accounts for daily or weekly expenses.
Step 4: Organize Expenses by Days or Weeks
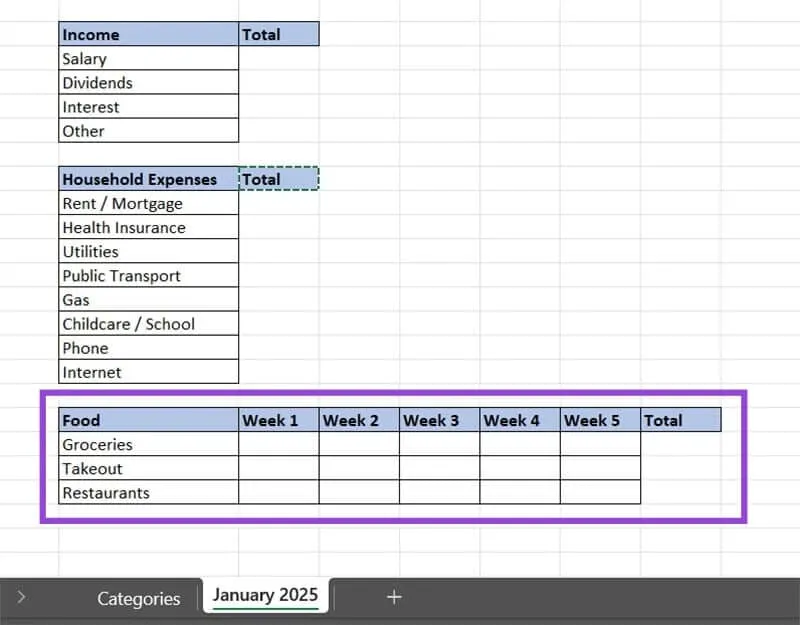
A mixed approach can be adopted here. Tracking your spending on a weekly basis can ease the process, but certain necessary expenses may only occur monthly. Therefore, you might detail the “Food” category by specific weeks.
Step 5: Apply Formulas for Weekly or Daily Totals
For every category tracking expenses weekly or daily, you should create a ‘Total’ cell that computes the sum of the respective row using the formula ” =SUM(Start_Cell:End_Cell).”
Here’s how to do this:
- Click on the cell designated for the total.
- Type the equals sign.
- Input “SUM” and hit “Tab.”
- Highlight the cells you wish to add together.
- Press “Enter.”
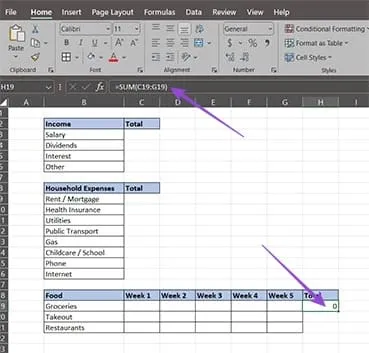
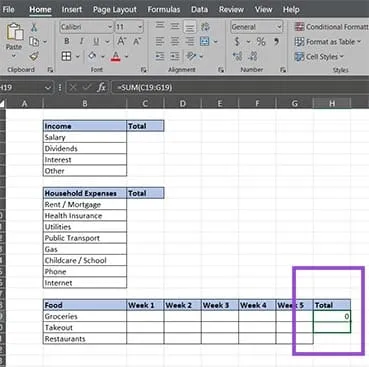
You will need to carry out this process for each category; however, you can expedite it by using the Fill Handle in the bottom-right corner of the cell to drag down and apply the formula to the next row.
Step 6: Insert Subtotals for Each Category
To streamline the process, add an additional row to each subcategory for listing its subtotal, which will contribute to the overall total.
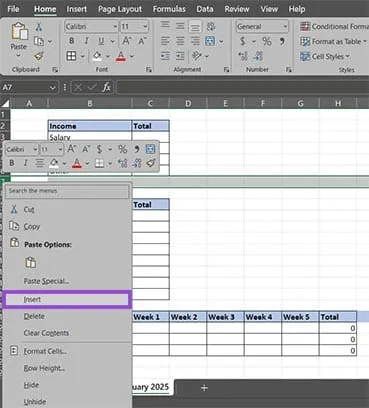
To add a row, right-click the header below the targeted row and choose “Insert.” For example, to create a subtotal under “Salary,” right-click row 7 to insert a new entry there.
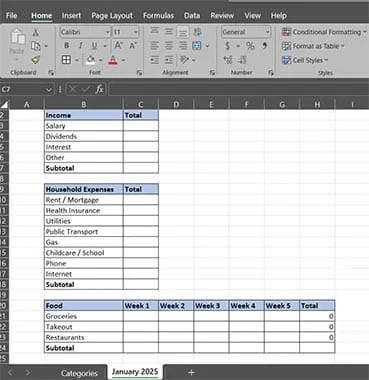
This is a brief illustration of how the table should be formatted.
Step 7: Compute the Subtotals
Utilize the same SUM formula used for the weekly food tally to derive subtotals for each category.
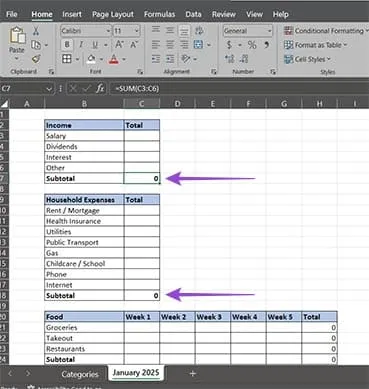
Step 8: Compute the Total Monthly Figures
Develop a compact table that records all categories along with their respective subtotals. Reference each “Subtotal” directly—for instance, referencing income subtotal from cell C7 with ” =C7.” This can be accomplished by selecting a cell, typing the equals sign, clicking on the desired cell, and then pressing “Enter.”
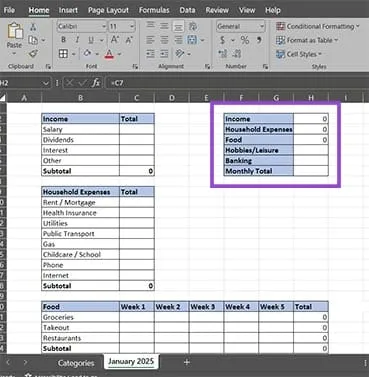
Consider merging the category name cell to enhance visibility. You can find the “Merge” option within the “Alignment” section of the “Home” tab.
Step 9: Derive the Overall Monthly Total
Utilize the final SUM formula to determine the month’s total. This time, it’s essential to subtract total expenses from the income subtotal.
- Click on the “Monthly Total” cell (e.g., H7).
- Type in the equals sign.
- Click on the Income subtotal cell.
- Input the minus sign.
- Type “SUM,” then hit “Tab.”
- Select all relevant cells from your smaller table.
- Close the bracket with “)” and press “Enter.”
Below, you’ll see the formula that results from this process in cell H7.
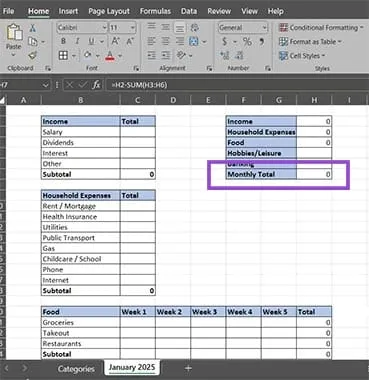
Step 10: Duplicate the Monthly Sheet for Additional Months
To duplicate a sheet, right-click its name in the lower tab and select “Move or Copy.”
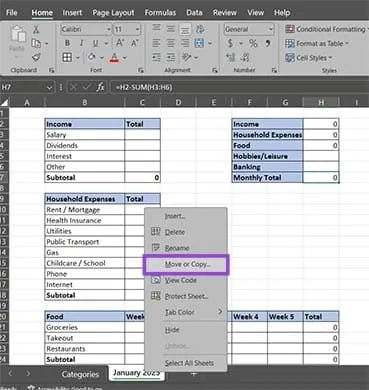
In the dialog box that appears, check the “Create a copy” option, then click “OK.”
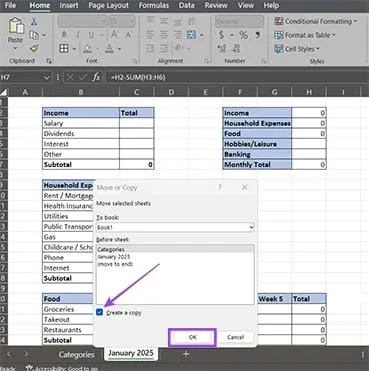
Rename the new sheet (right-click and choose “Rename”) and repeat these steps to generate as many monthly sheets as necessary.
Step 11: Begin Inputting Your Data
Your budget tracker is now complete, and you can start entering your data as desired.