5 Simple Methods for Transferring Files from iPhone to Mac
The most widely used method for transferring files from an iPhone to a Mac is AirDrop. Yet, such a convenient tool may not always work when you need it most, potentially leaving you stranded. In this article, we will explore four alternative methods for transferring files from an iPhone to a Mac, in addition to the classic AirDrop approach.
Each technique listed below presents distinct benefits, allowing for a smooth file transfer process. Whether you need to free up space or secure your photos and videos on your Mac, transferring files from your iPhone can be extremely beneficial. Let’s get started!
Method 1: AirDrop for File Transfers Between iPhone and Mac
AirDrop provides the most straightforward and efficient way to transfer files from your iPhone to any Mac. You can utilize the Photos app or the Files app for transferring your files. Below are the detailed steps for both methods.
Using AirDrop from the Photos App
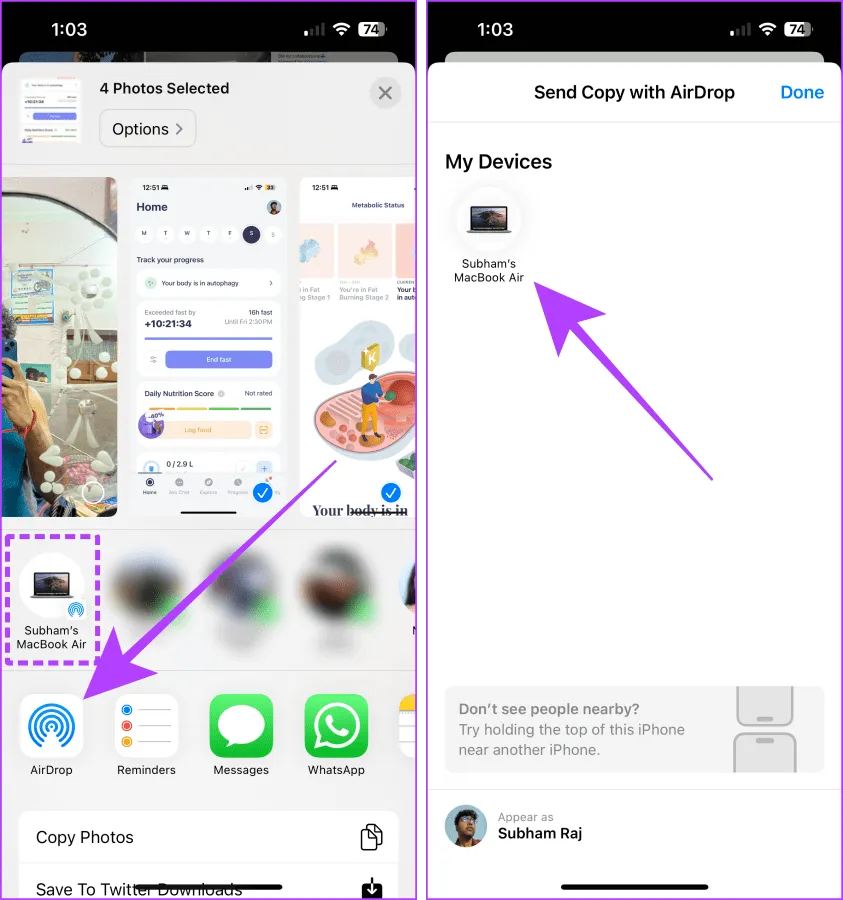
Step 1: Open the Photos application on your iPhone and tap on Select.
Step 2: Choose the images or videos you want to transfer and then tap the share icon located at the bottom left of the screen.

Step 3: When transferring to your Mac, it should appear as the first choice in the Share sheet. Tap it to start the transfer process. If you are sending files to another Mac, select the AirDrop icon instead.
Step 4: Now, tap on the desired Mac in order to transfer the selected photos or videos.
Using AirDrop from the Files App
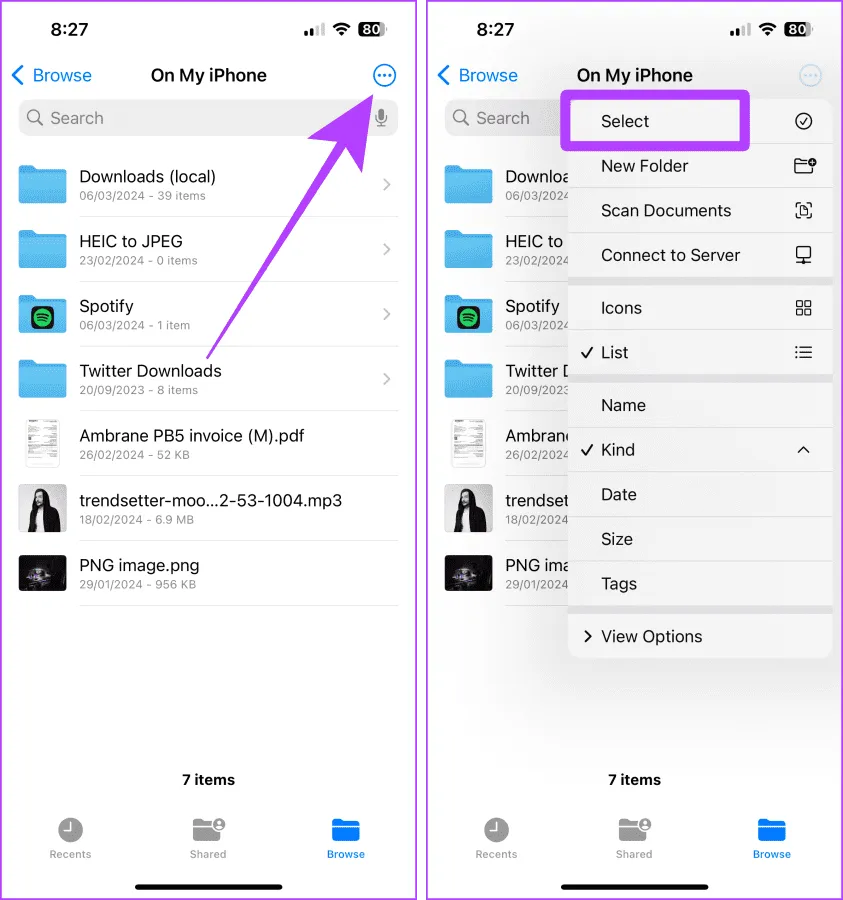
Step 1: Open the Files app on your iPhone, locate the file to be transferred, and tap on the kebab menu (three dots).
Step 2: Select the option to choose from the menu.
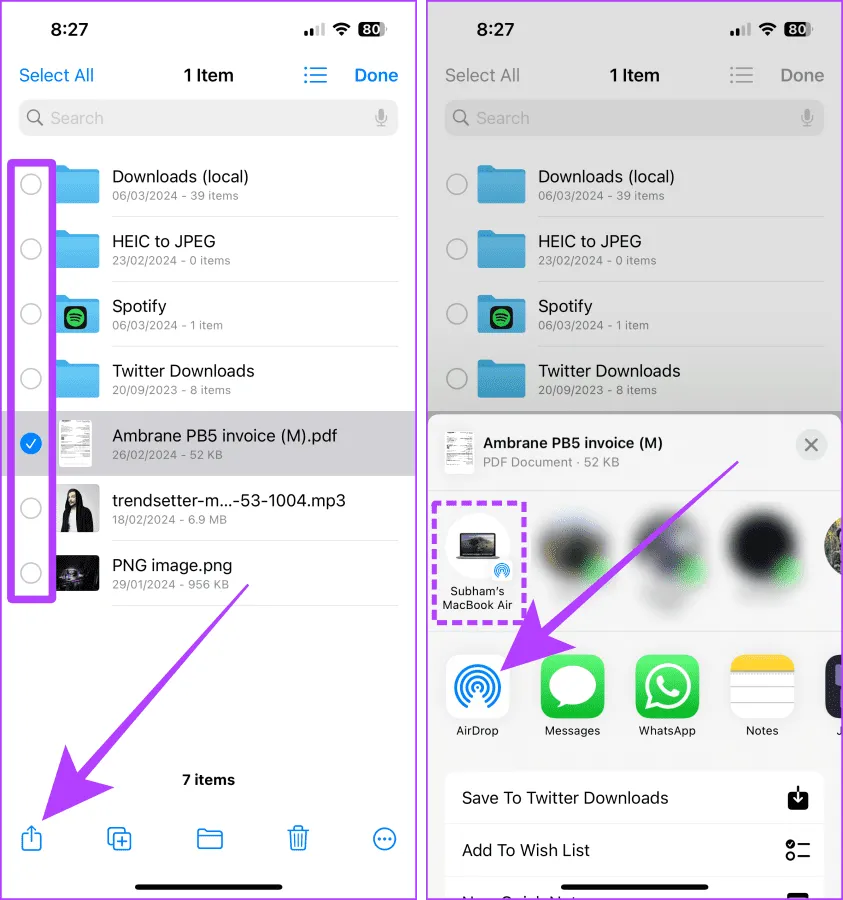
Step 3: Choose the file to transfer, then tap the share icon located on the bottom toolbar.
Step 4: Just like in the Photos app, your Mac will show as the first option on the Share sheet. Tap it to initiate the file transfer. Otherwise, select the AirDrop icon if sending to a different Mac.
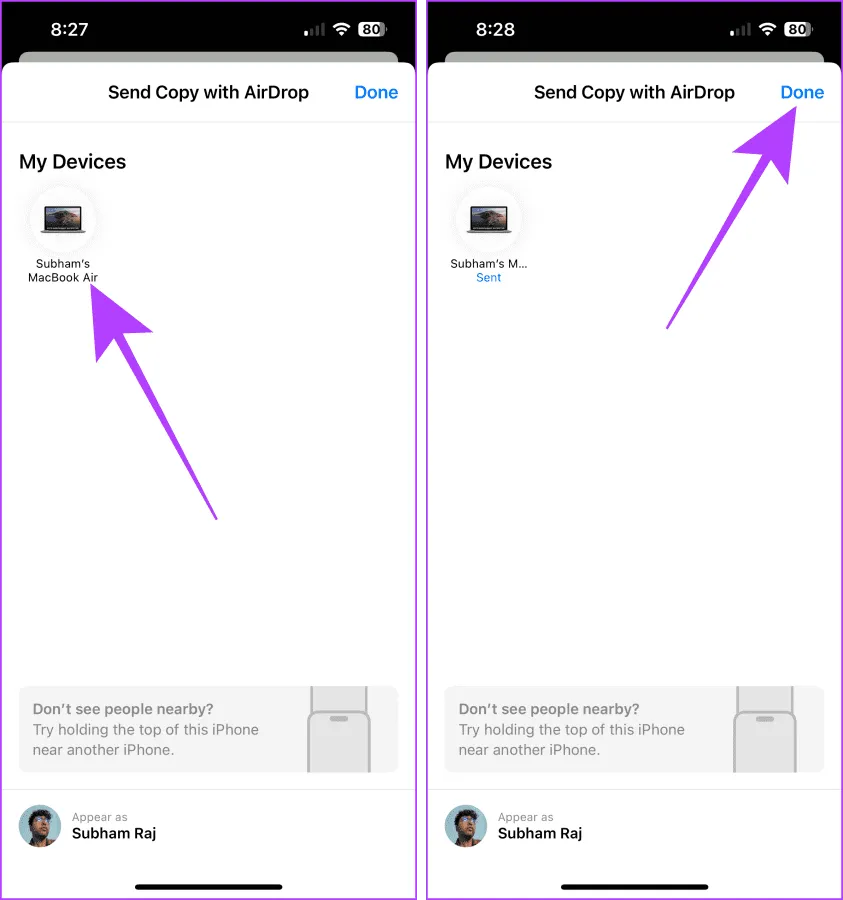
Step 5: Tap on the name of the target Mac to start the transfer process.
Step 6: Once AirDrop finishes, tap Done to exit.
Method 2: Using a USB Cable for File Transfer
An alternative to AirDrop is using a USB cable to directly transfer media files from your iPhone to your Mac. This is particularly useful when Wi-Fi is unavailable or you are transferring files to another person’s Mac. Follow these steps:
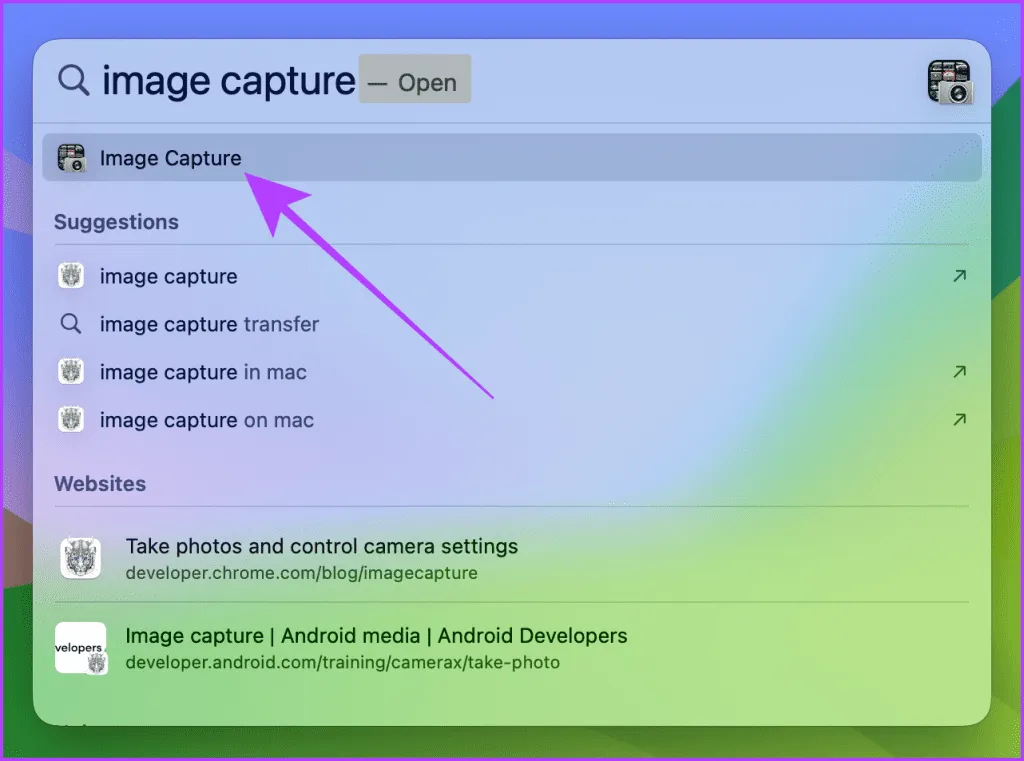
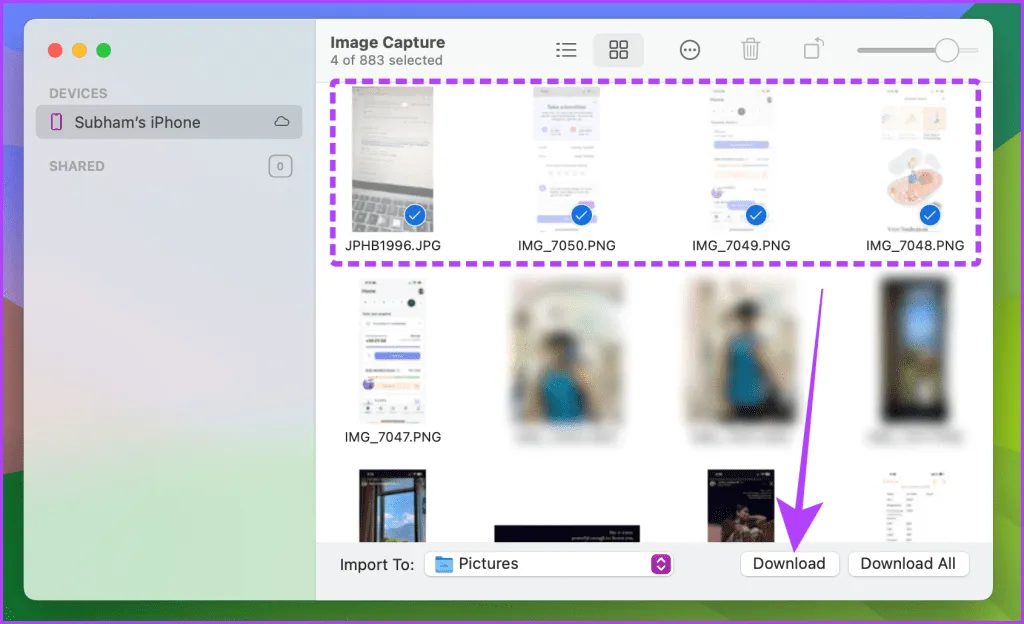
Step 1: Open the Image Capture application on your Mac by using Spotlight Search (Cmd + Spacebar).
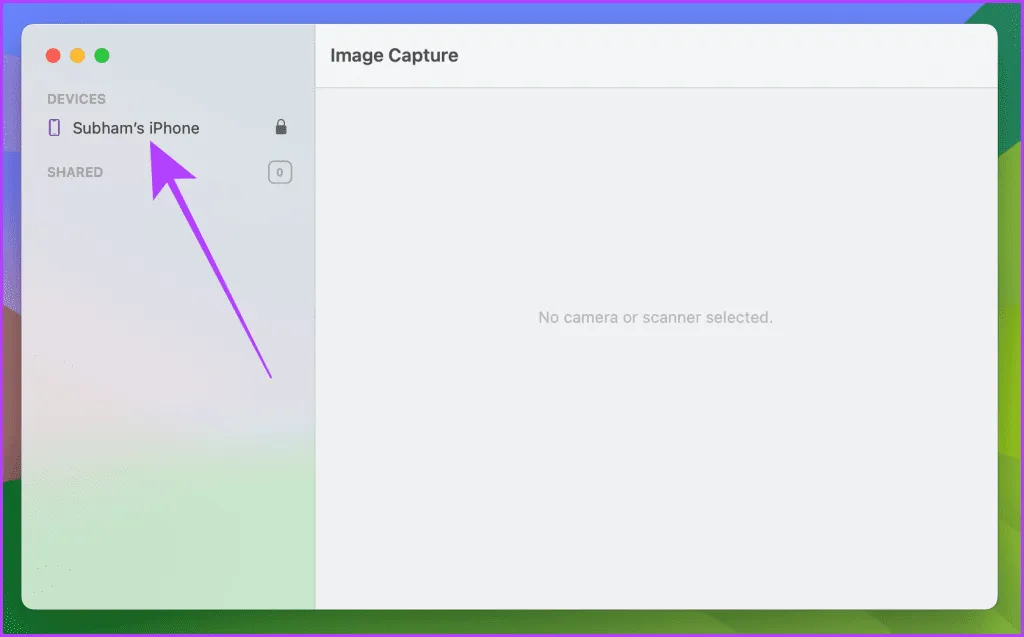
Step 2: Connect your iPhone to your Mac using the USB cable and wait for its icon to appear in the device list. Click on your iPhone.
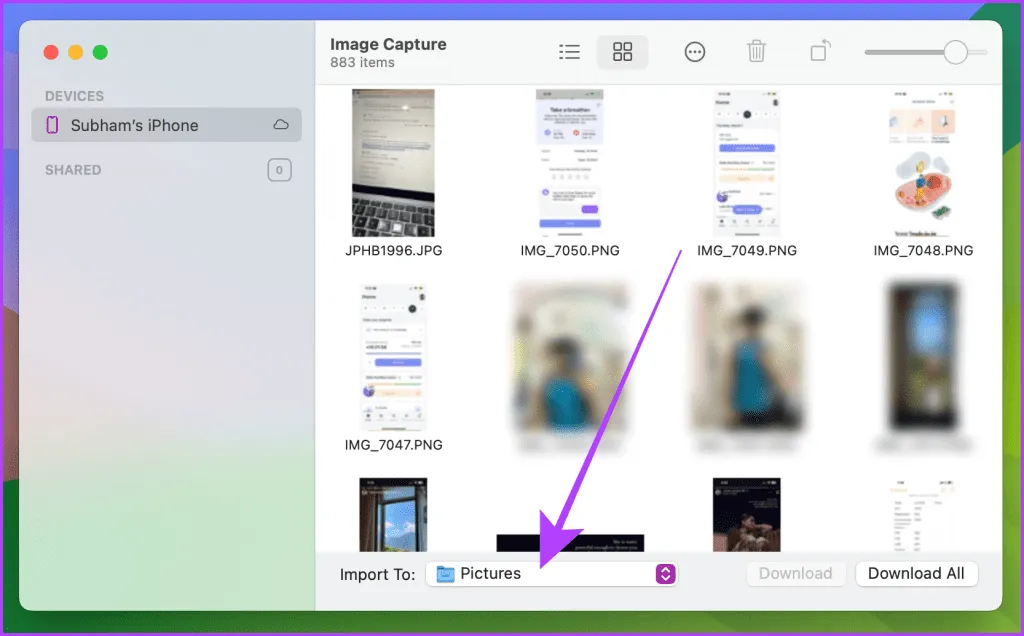
Step 3: Click on the folder name next to Import To to select the destination folder on your Mac for the transferred files.
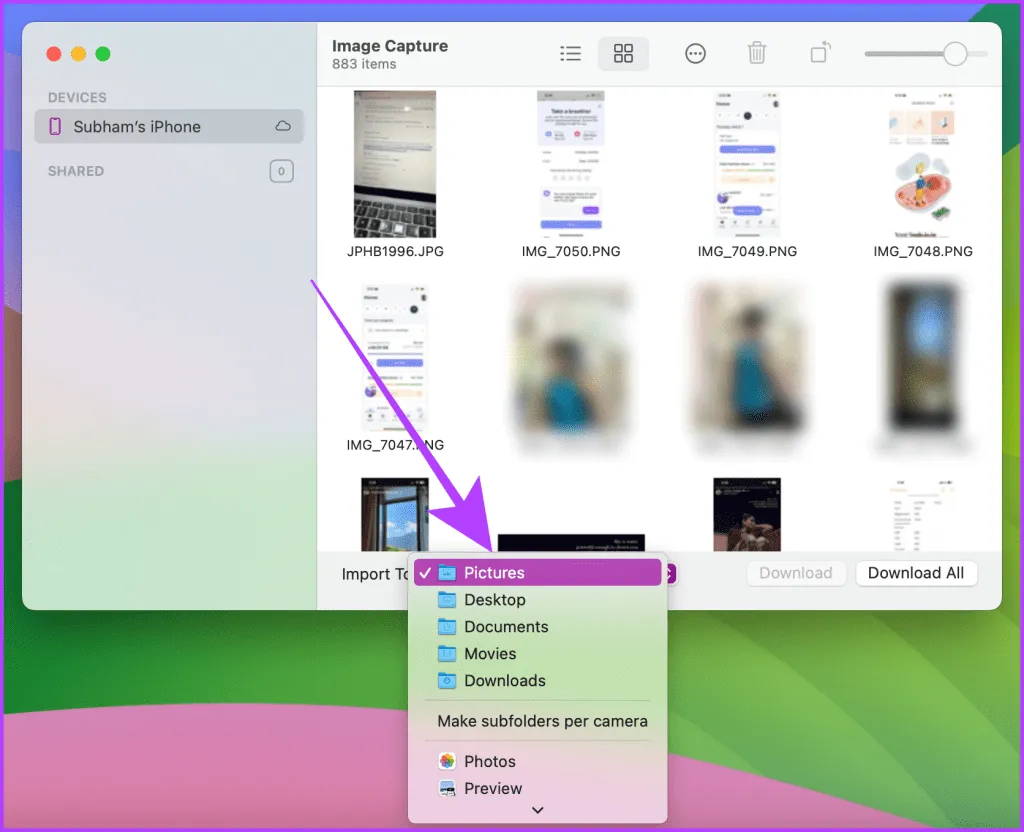
Step 4: Choose the preferred folder from the drop-down list for saving your photos or videos.
Step 5: Select the items you wish to import and then click Download.
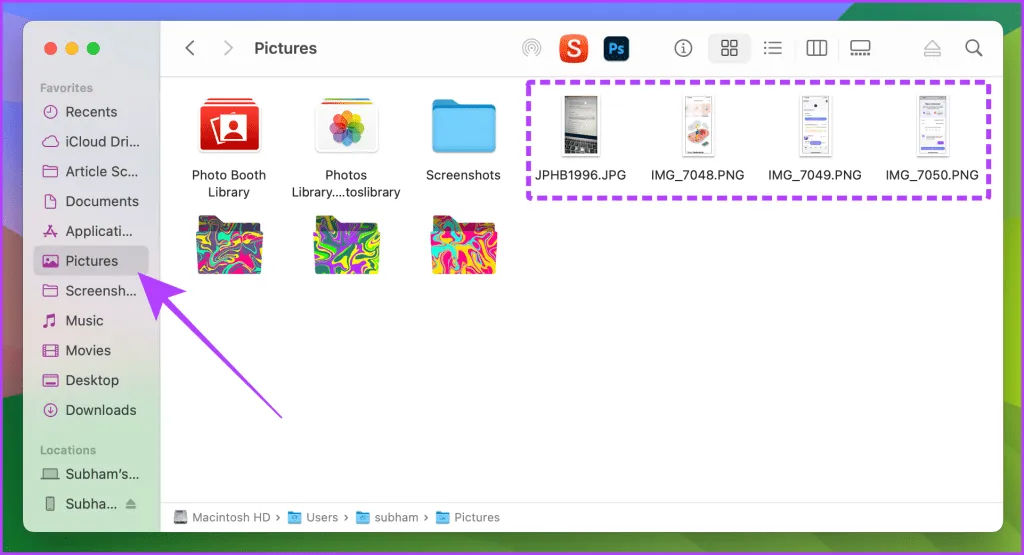
Step 6: Open the Finder on your Mac and navigate to the selected folder to find your transferred files.
Method 3: Transfer Files Using iCloud Drive
If both your Mac and iPhone are signed in with the same Apple ID, you can use iCloud Drive for transferring files from the Files app on your iPhone to your Mac. Here’s how:
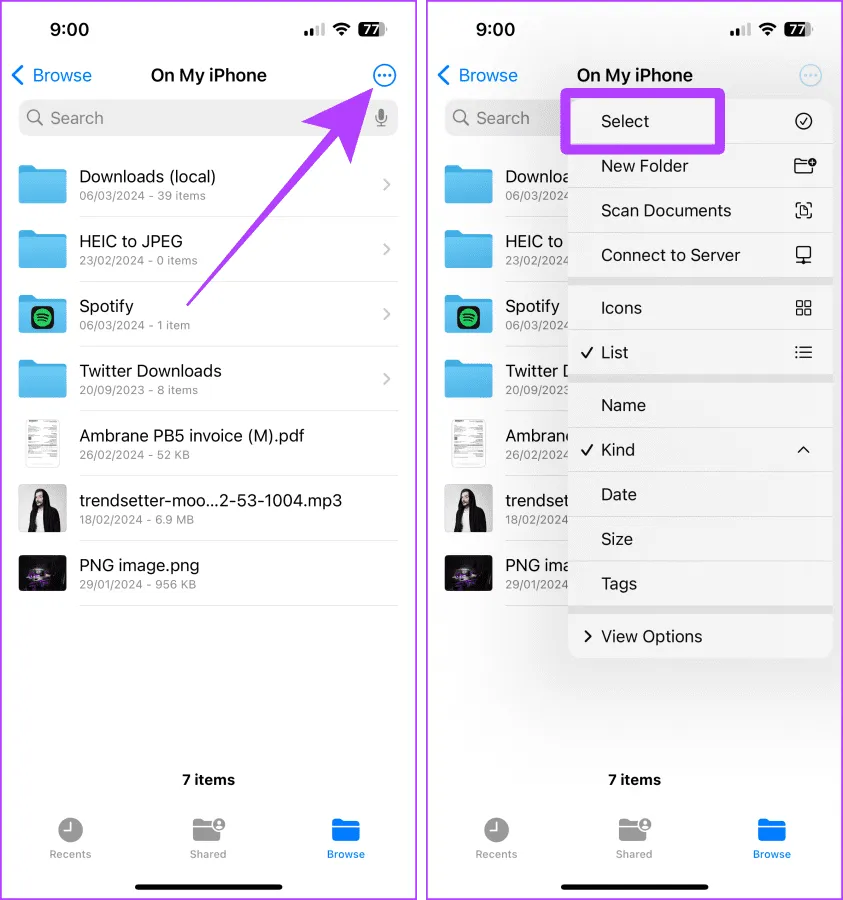
Step 1: Access the Files app on your iPhone, locate the file, and tap the kebab menu.
Step 2: Hit Select from the options.
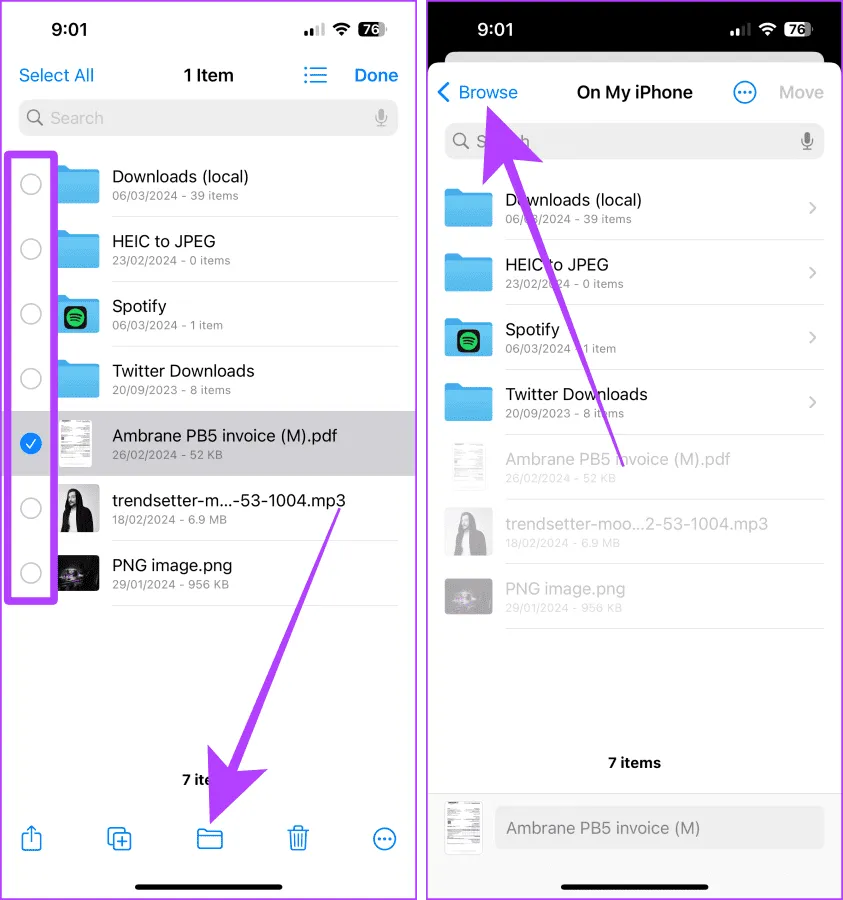
Step 3: Select the file and hit the Move option.
Step 4: Next, tap Browse.
Step 5: Choose iCloud Drive.
Step 6: Hit Copy to move the file there.
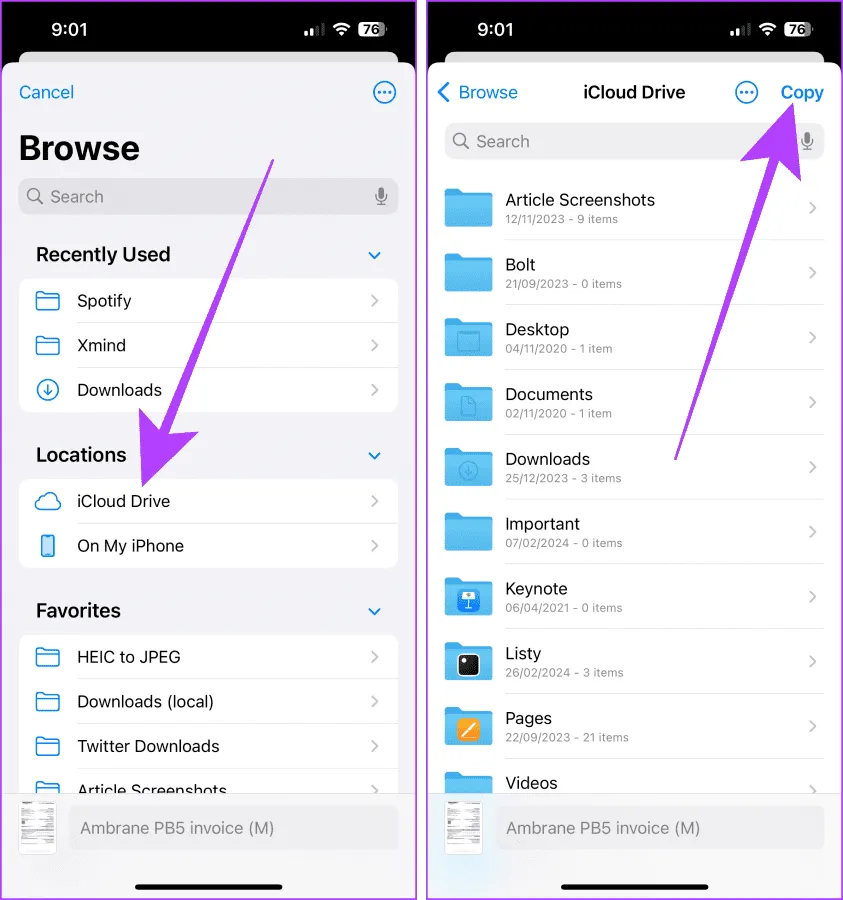
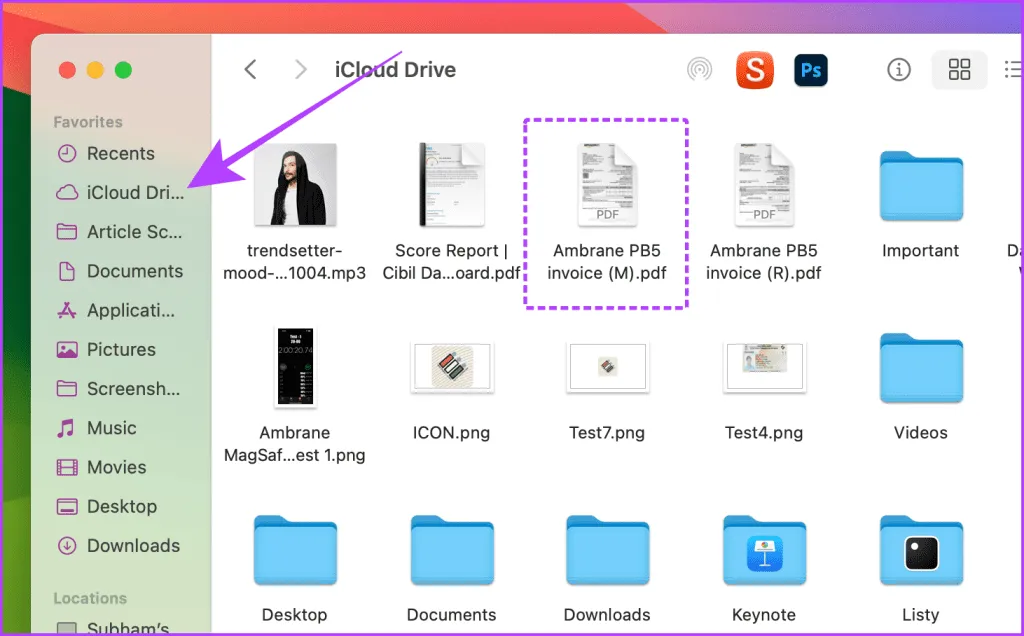
Step 7: Open Finder on your Mac and navigate to iCloud Drive to find your file.
Method 4: Use Google Drive for Transfers
If iCloud Drive is running low on space, consider using Google Drive for transferring files from your iPhone to your Mac. We’ll split the process into two sections: ‘On Your iPhone’ and ‘On Your Mac’. Follow these steps:
On Your iPhone
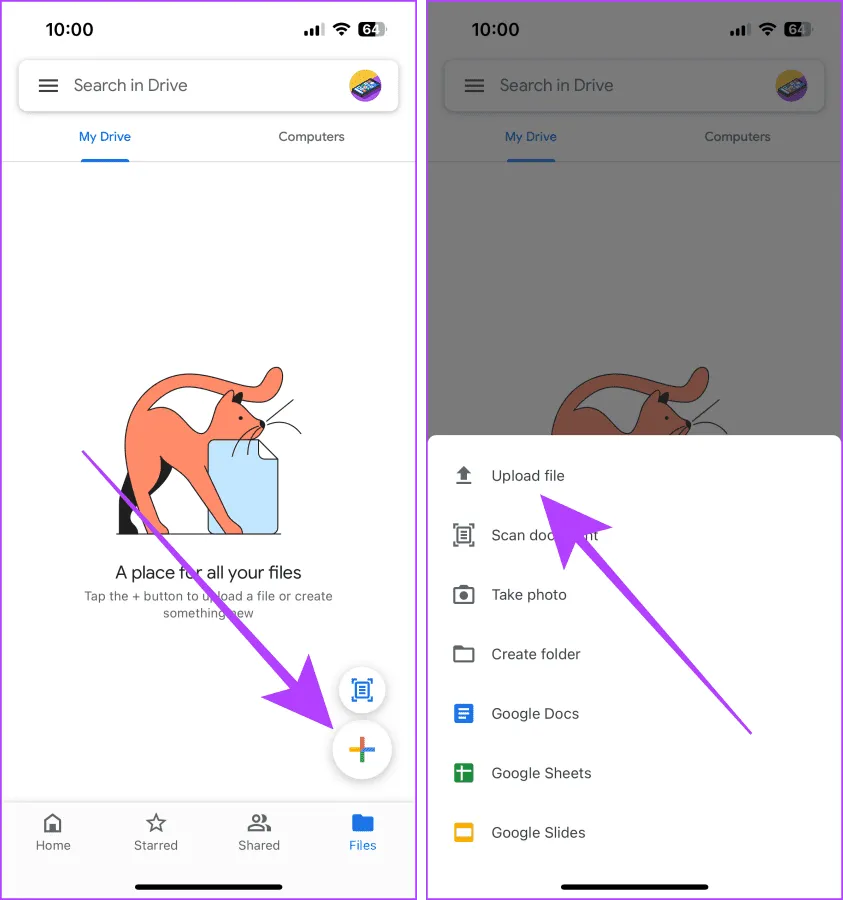
Step 1: Open the Google Drive application on your iPhone and tap the + sign.
Step 2: Select the Upload file option from the menu.
Step 3: Tap Browse to select files from the Files app. If you want to transfer media from the Photos library, select Photos & Videos.
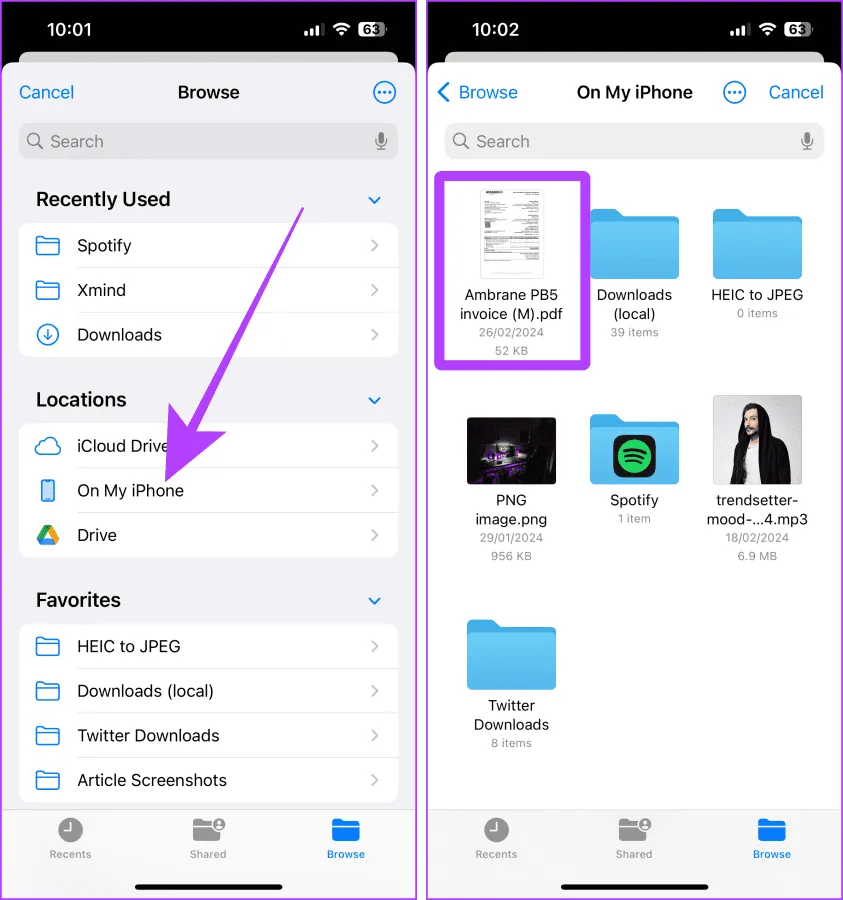
Step 4: Go to the Browse tab.
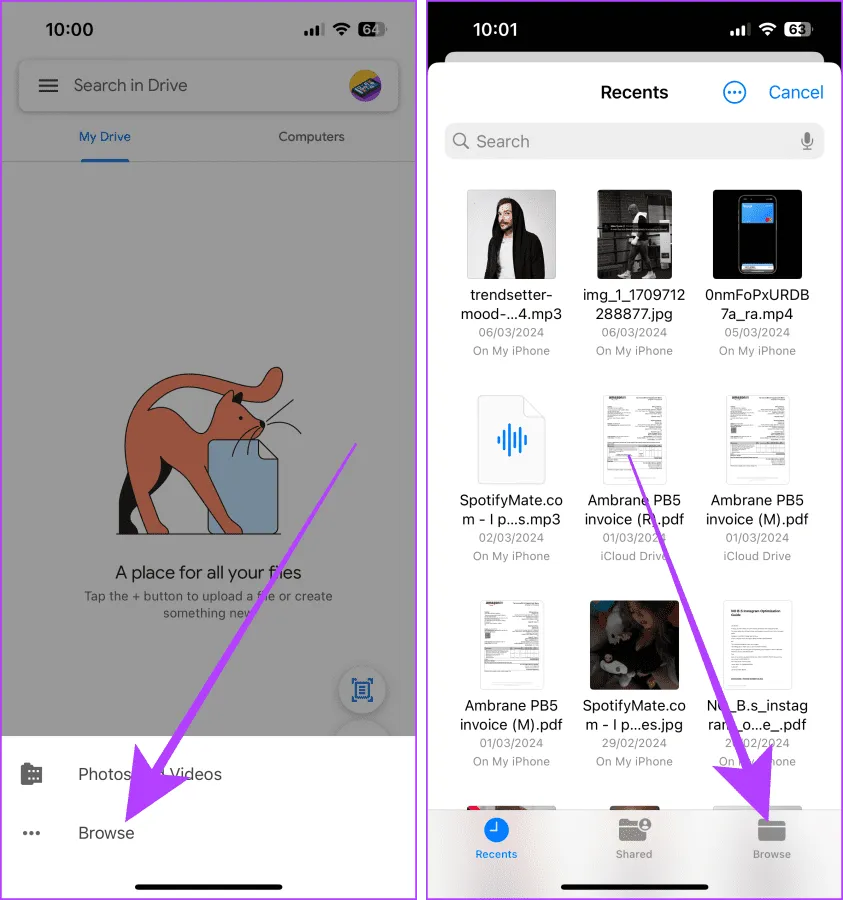
Step 5: Navigate to On My iPhone.
Step 6: Choose the file you want to upload to Google Drive.
On Your Mac
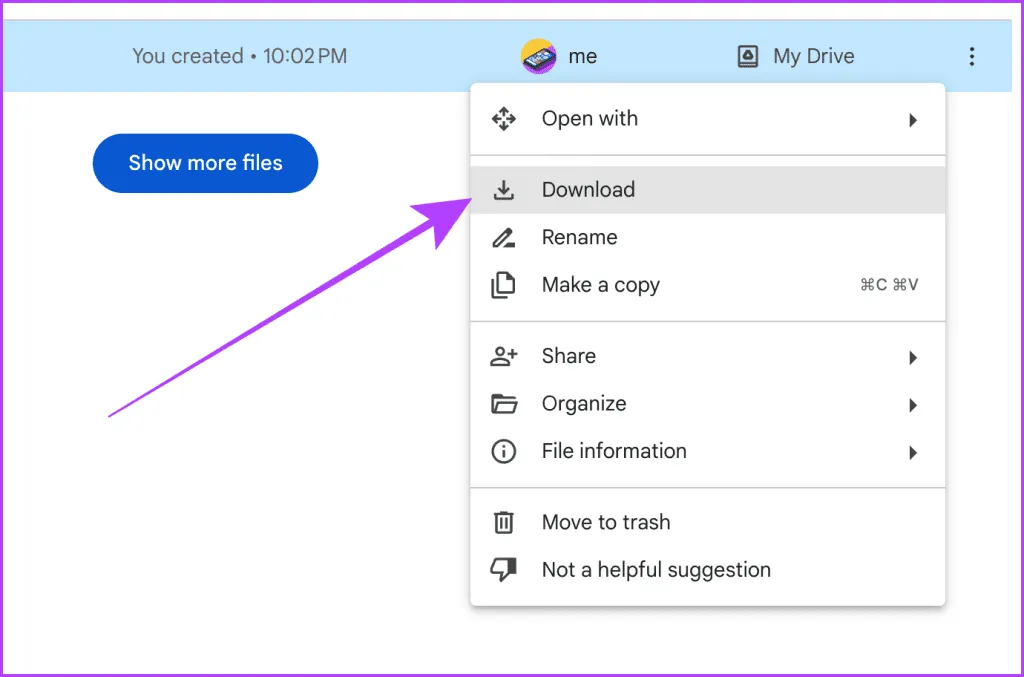
Step 7: Launch Google Drive in your preferred web browser on your Mac and locate the file.
Step 8: Click the kebab menu next to the file and choose Download from the dropdown menu.
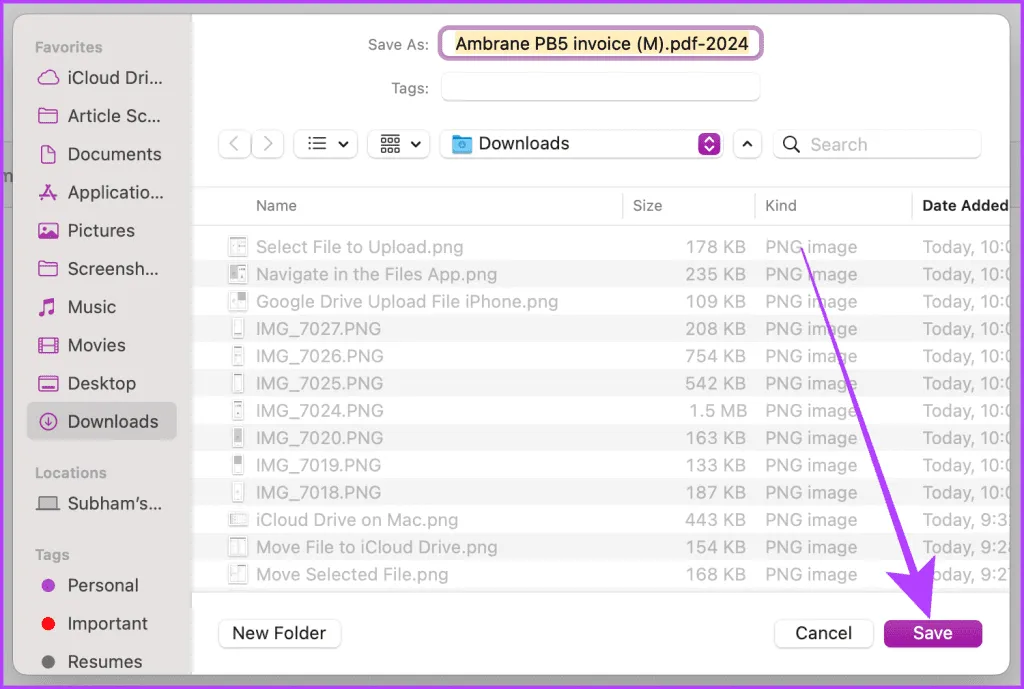
Step 9: Select a folder and click Save to designate the file’s location on your Mac.
You have now successfully used Google Drive to transfer files from your iPhone to your Mac.
Method 5: Using Snapdrop for Transfers
Snapdrop serves as an excellent alternative if you encounter difficulties with AirDrop on your iPhone or Mac. If both devices are connected to the same Wi-Fi network, Snapdrop can facilitate seamless file transfers. Here’s how it works:
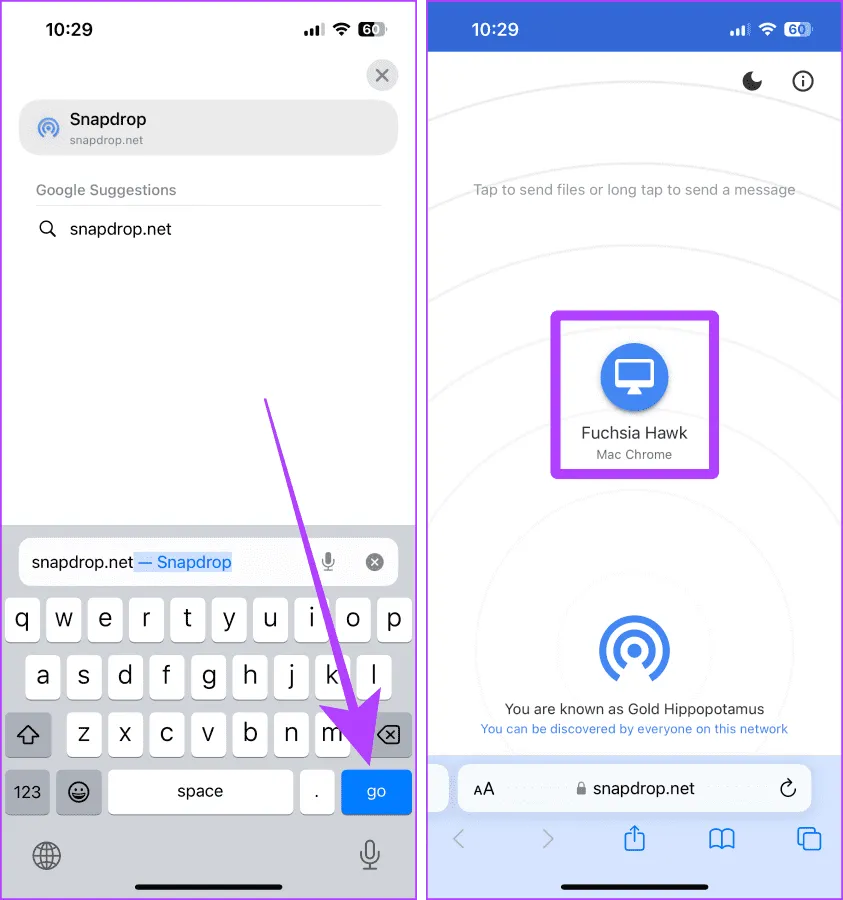
Step 1: Open Snapdrop in a browser window on your Mac.
Step 2: On your iPhone, open Snapdrop in either Safari or Chrome.
Step 3: Your Mac should appear as an available device. Tap on it.
Step 4: Select Choose Files to open files from the Files app. To send photos or videos from your Photos library, tap Photos Library.
Step 5: Return to find the file you want to transfer in the Files app.
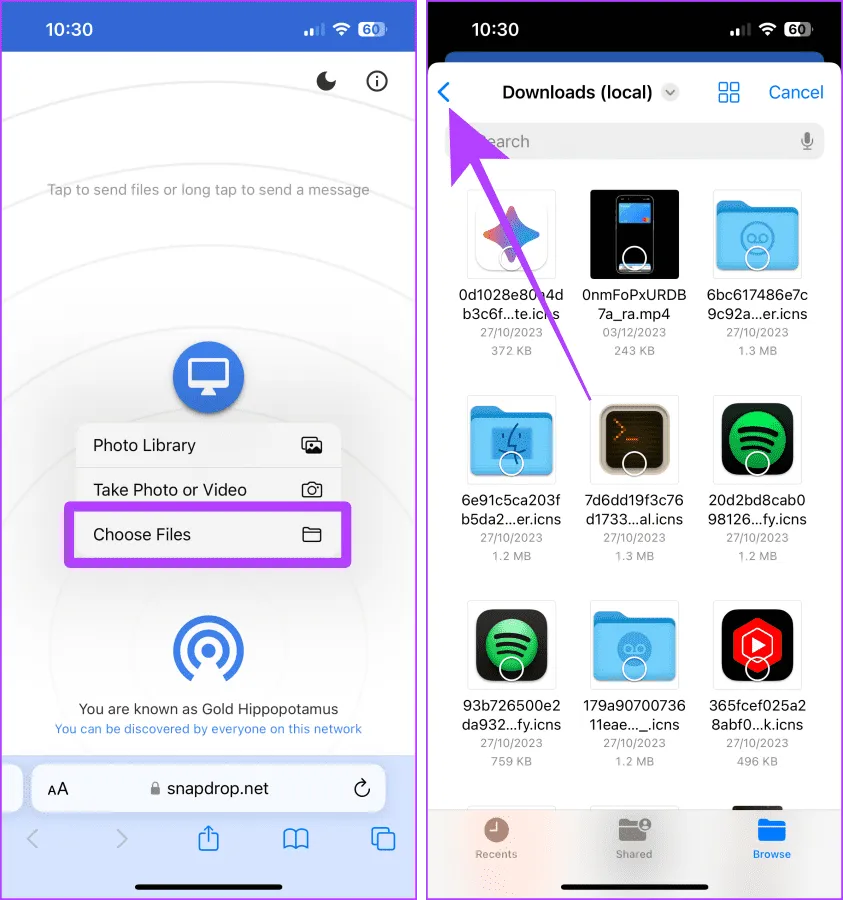
Step 6: Select the file and click Open to prepare it for transfer to your Mac.
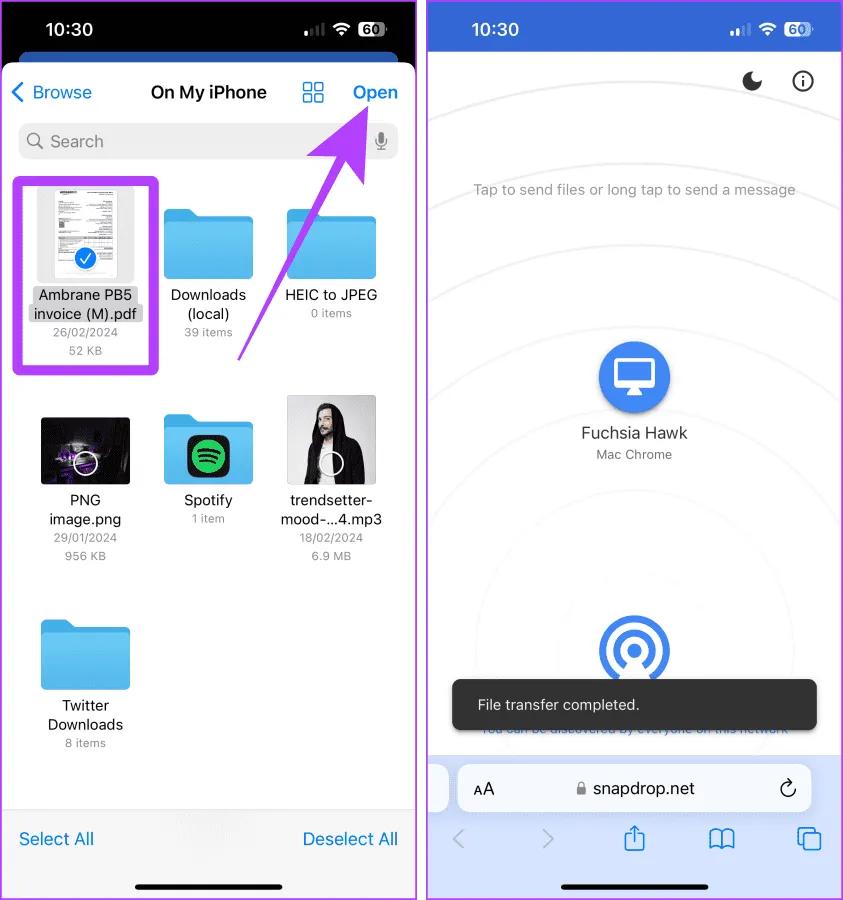
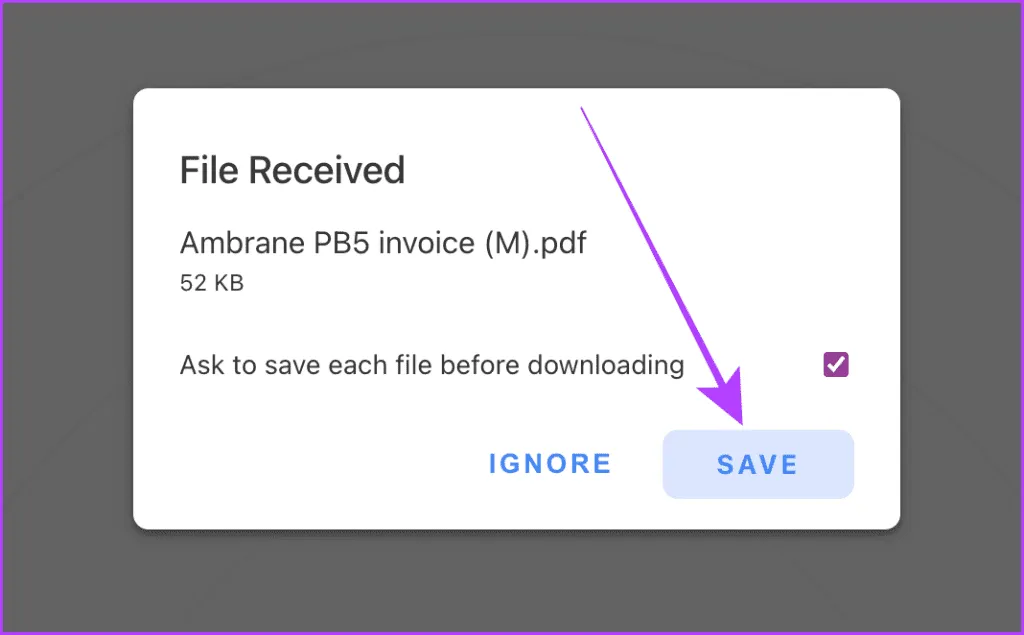
Step 7: A pop-up will appear on your Mac. Click Save to store the file on your Mac.
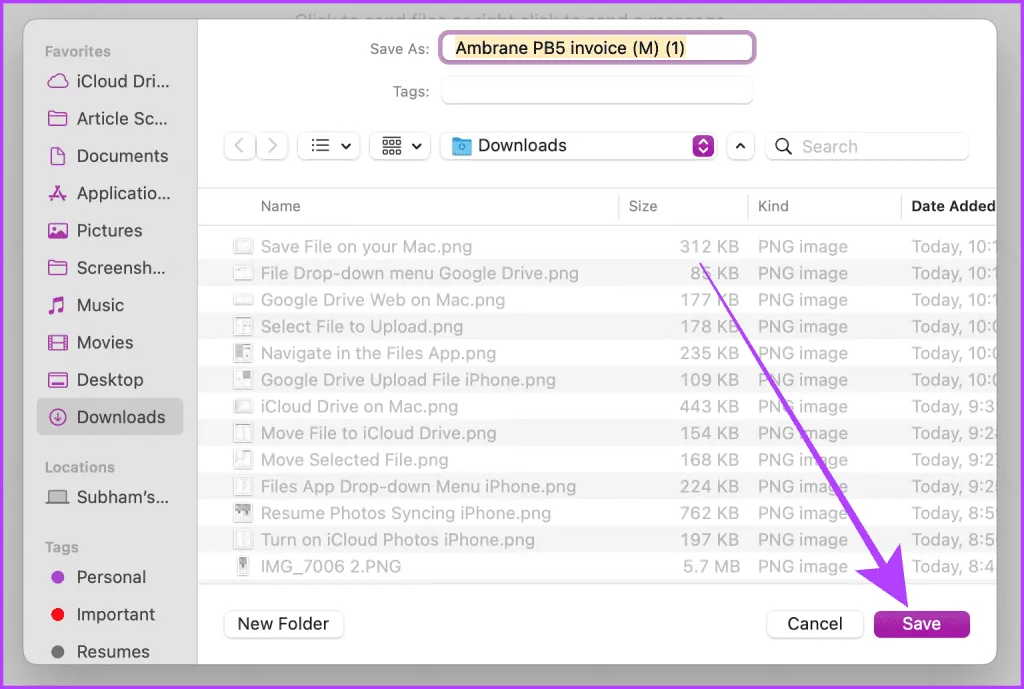
Step 8: Choose your save location and click Save to complete the transfer.
Effortless File Transfers
In case of an AirDrop mishap, there is no need to stress. Utilize the methods detailed above to swiftly transfer files, photos, or videos from your iPhone to your Mac.
Image Credits: Guidingtech.com