6 Effective Methods to Customize Google Chrome on Your iPhone
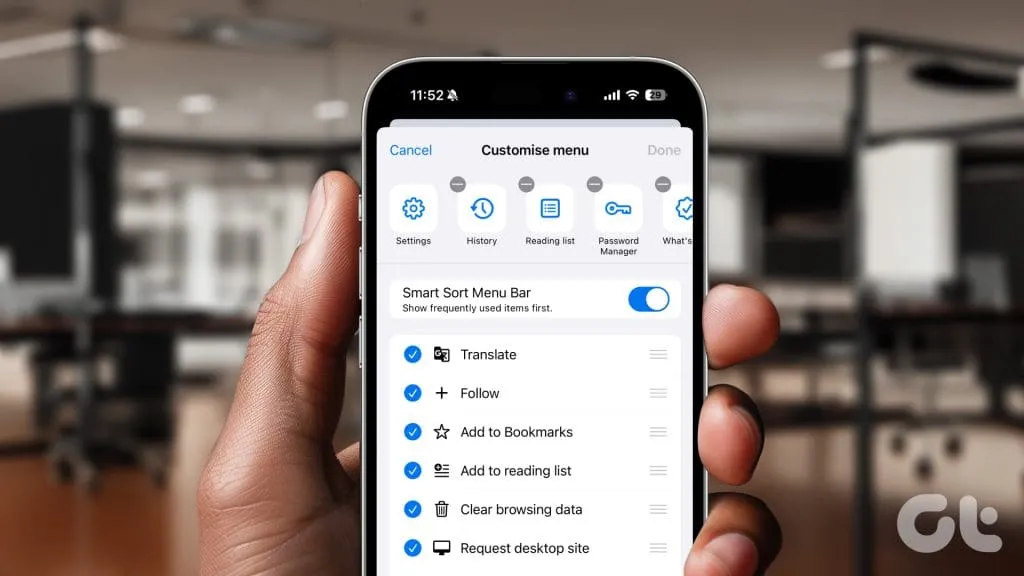
1. Personalize Google Chrome’s Menu
In the past, customization of the menu in Chrome for iOS was not supported by Google. However, with the recent stable update, this functionality is now enabled. Here’s how to customize it:
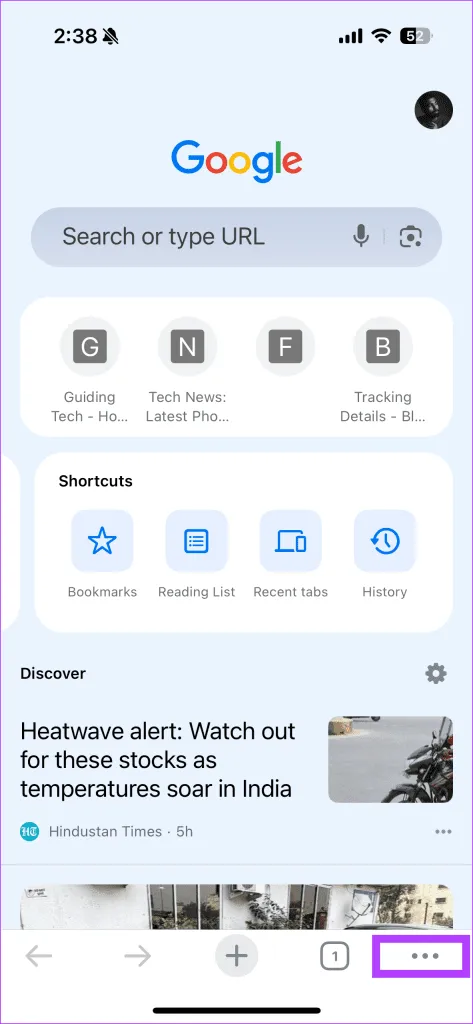
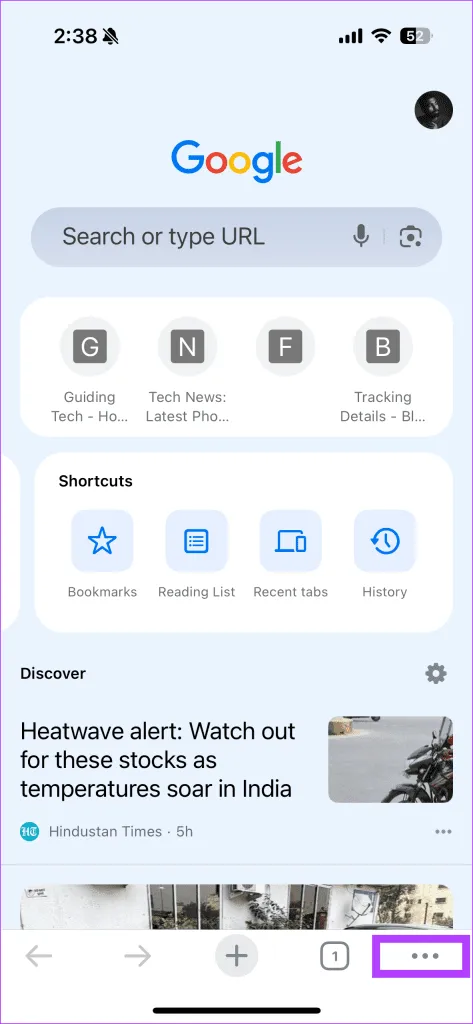
Step 1: Click on the three-dot menu located at the bottom right corner and scroll to find Customize Menu.
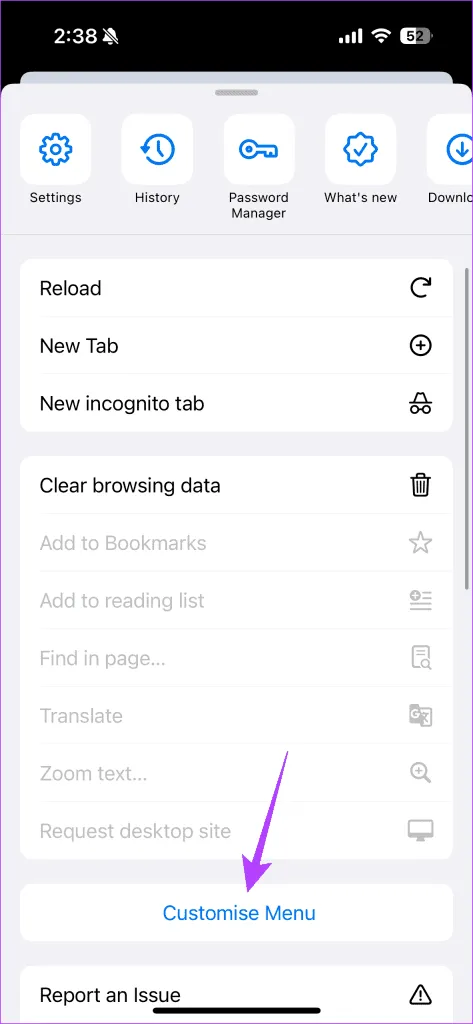
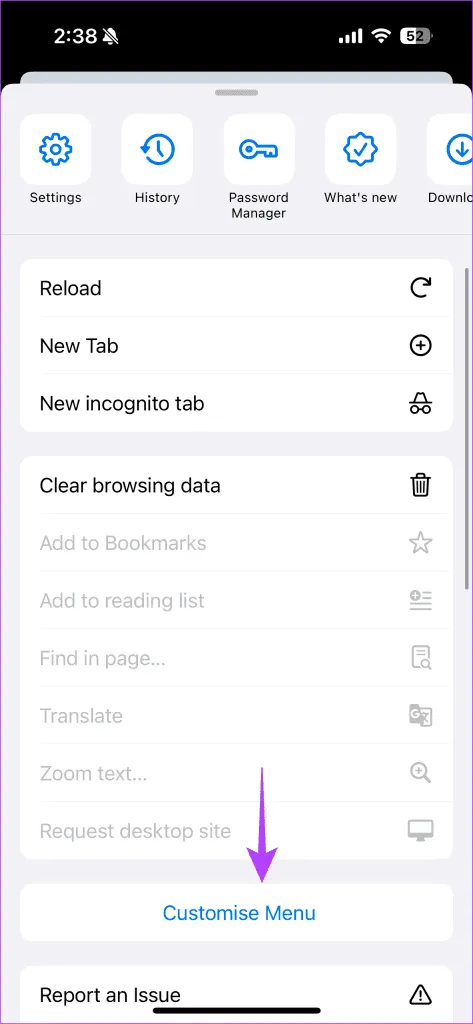
Step 2: Select Customize Menu.
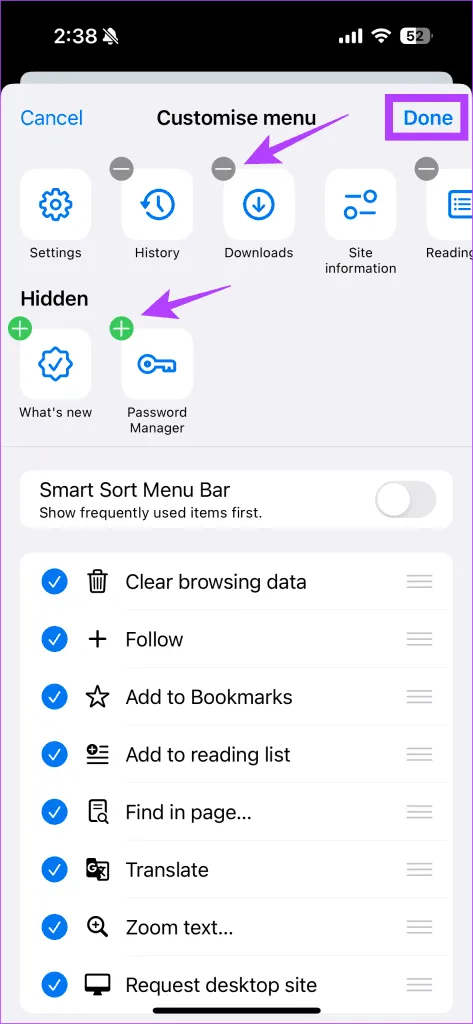
Step 3: Add or remove various shortcuts from the Carousel as per your preference. Tap Done to save your changes.
2. Modify the Actions List
Rearrange the actions list according to your personal usage, placing the most frequently utilized actions at the top. Here’s how:
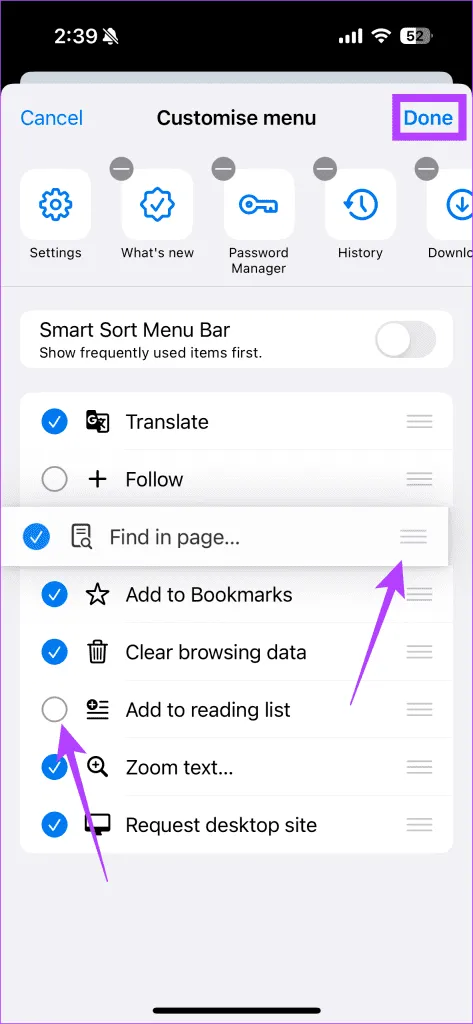
Step 1: When you access the Customize Menu, various actions will appear under the Smart Sort Menu Bar toggle.
Step 2: You can rearrange the items by dragging them or disable them by unchecking.
Step 3: After making your adjustments, hit Done.
3. Adjust Address Bar Position
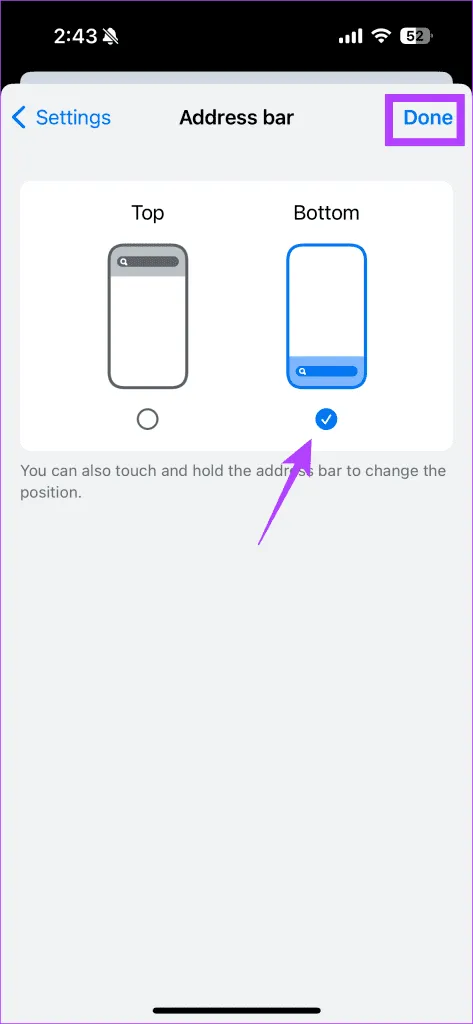
Decide whether you want the Address Bar at the top or bottom, similar to Safari’s layout. Here’s how:
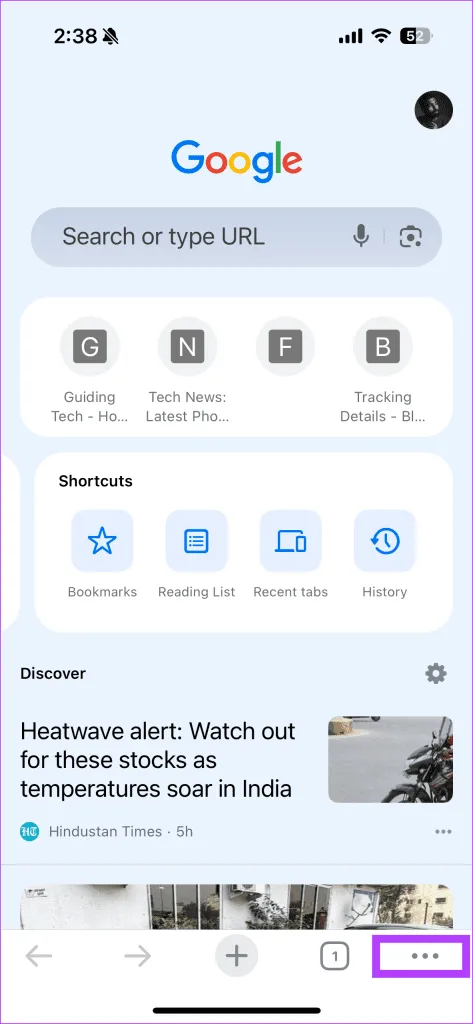
Step 1: Access the three-dot menu and then navigate to Settings in Google Chrome.
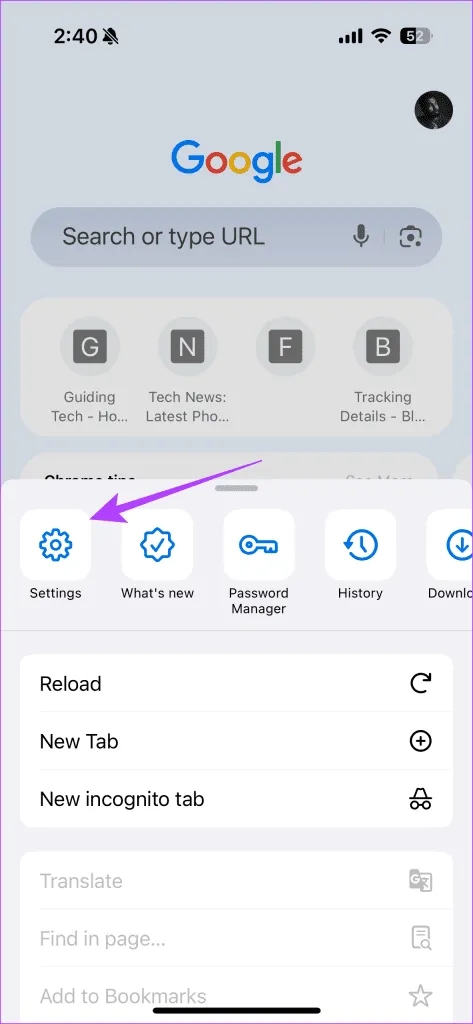
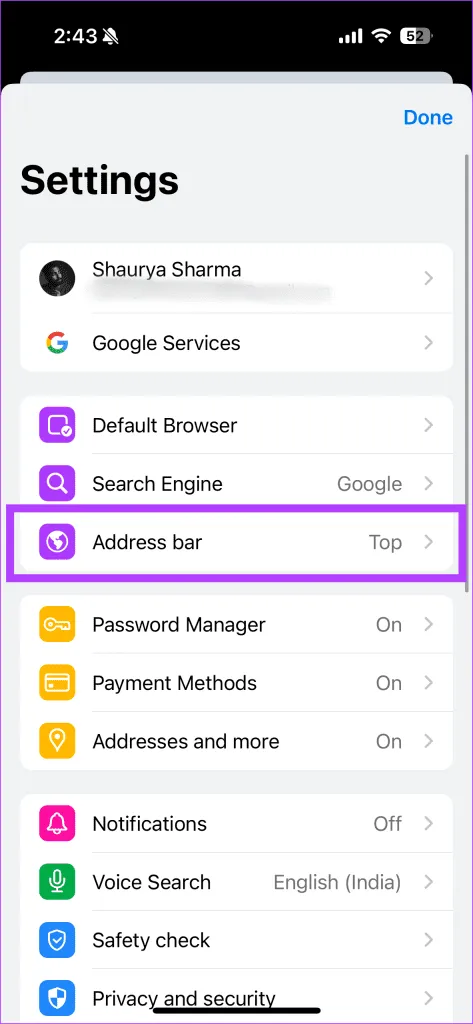
Step 2: Search for Address Bar and select it.
Step 3: Choose to display the Address Bar at the bottom or top, then hit Done.
4. Disable Google Discover Feed
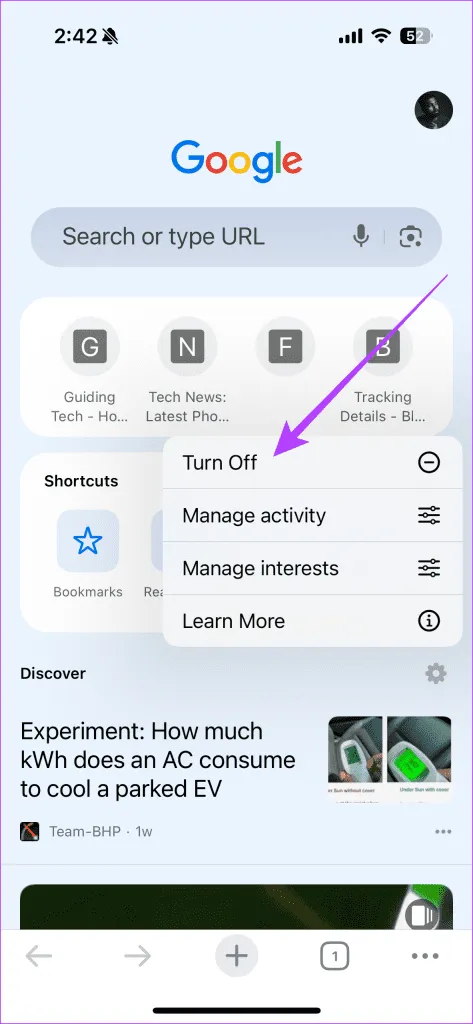
If you’d rather not see recommended content displayed in Chrome, you can turn off the Google Discover Feed. Follow these steps:
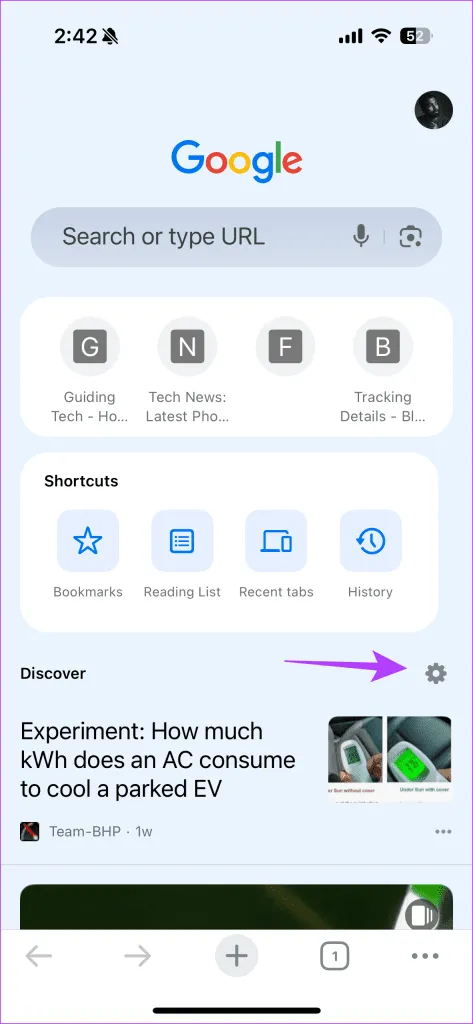
Step 1: Launch Chrome and locate the Discover section.
Step 2: Find the gear icon.
Step 3: Click the gear icon, then select Turn Off.
5. Set Time for Tabs to Move to Inactive Section
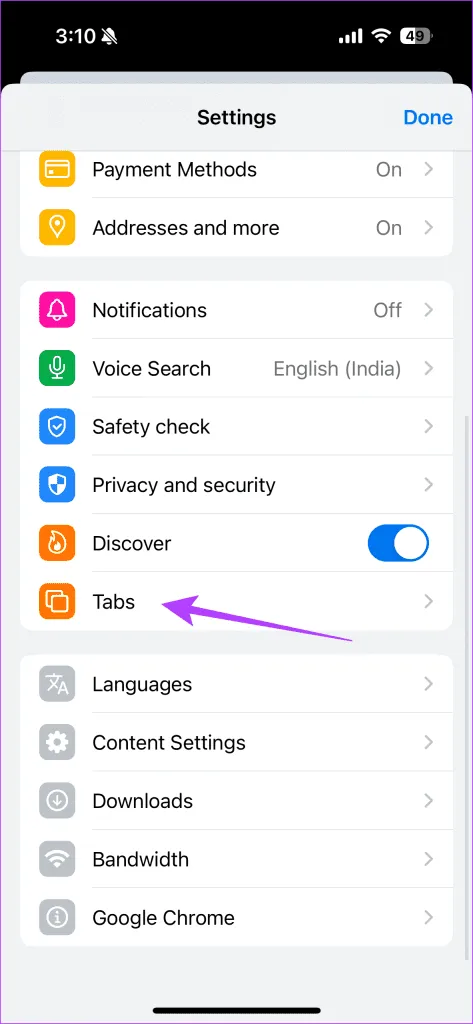
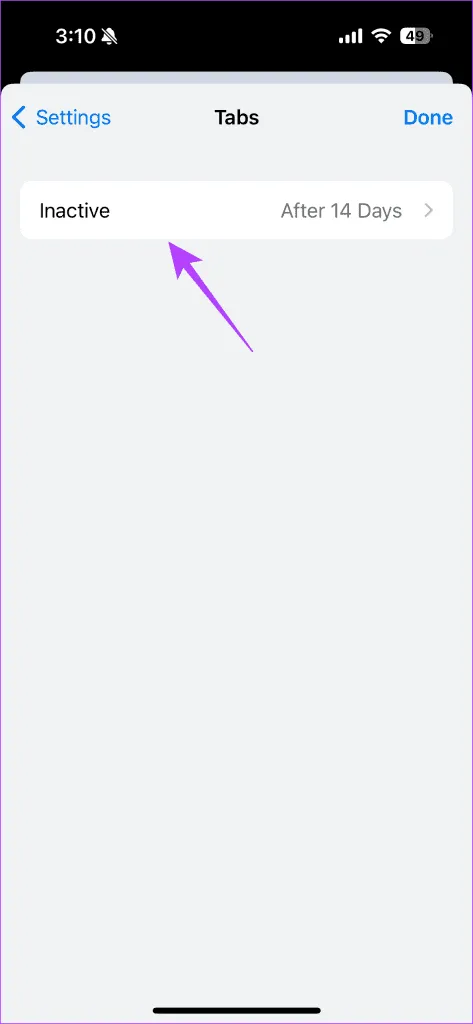
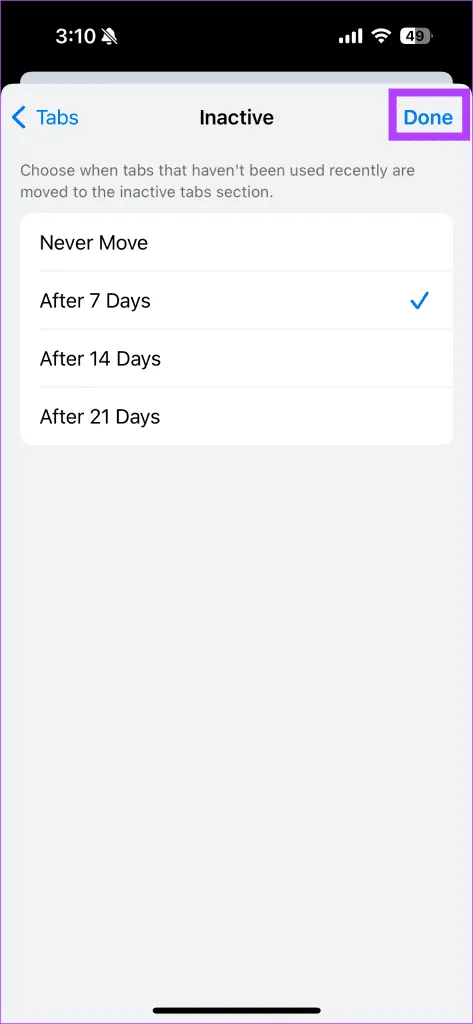
You can customize how long it takes for Chrome to categorize tabs as inactive, or opt to keep them all active. Here’s how:
Step 1: Go into Chrome Settings and select Tabs.
Step 2: Choose Inactive.
Step 3: Select your preferred timeframe and tap Done.
6. Set Your Preferred Email Application as Default
If you would like Chrome to open your chosen email application by default, you can configure this through the Chrome Settings:
Step 1: Access Chrome Settings, then find and select Content Settings.
Step 2: Tap on Default Apps.
Step 3: Choose your desired email application, such as Gmail, which I’ve selected in this example.
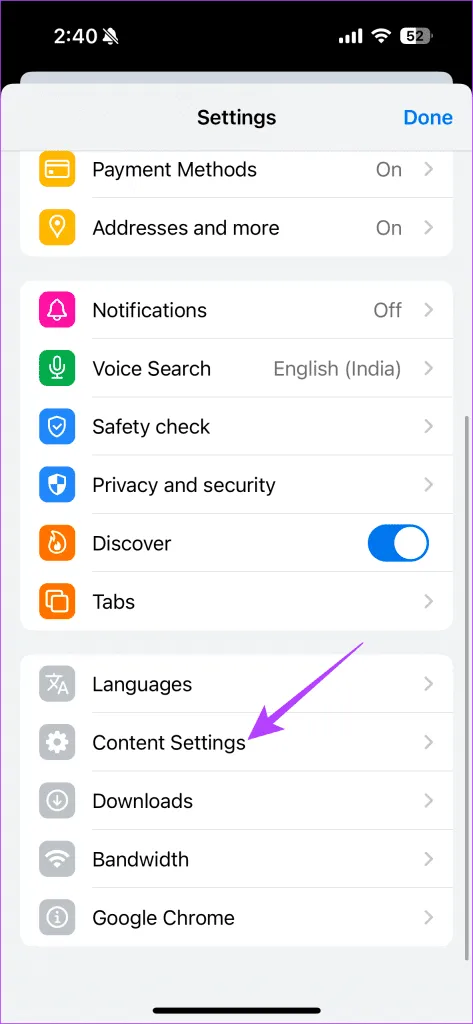
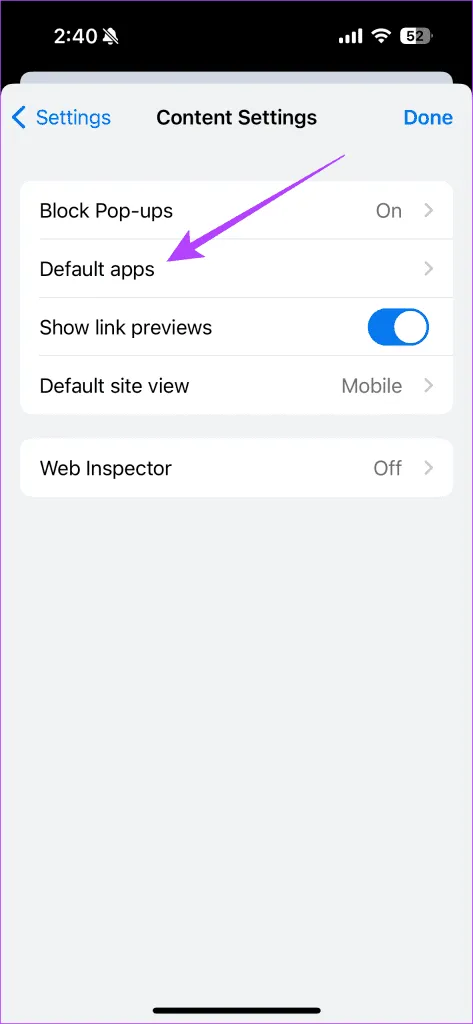
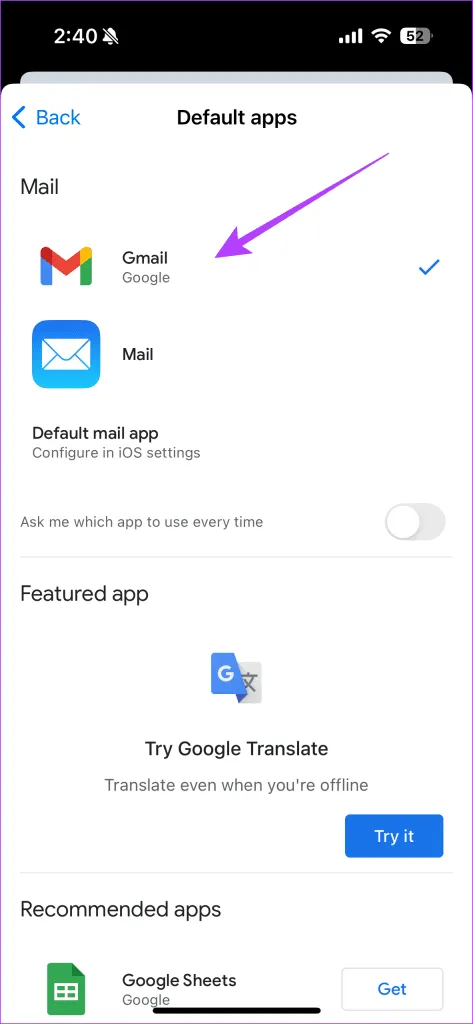
Image Credits: Guidingtech.com