Explore Four Cool Features of Windows Phone Link
After successfully installing the Phone Link application on your PC or laptop and connecting your smartphone, you’ve created a personalized mobile ecosystem. This setup allows you to interact with your Windows device similarly to how you would with your smartphone.
However, what are the best ways to maximize your Phone Link experience?
In this guide, we will uncover four impressive functionalities that have been integrated into Windows Phone Link.
Feature 1: Sending and Receiving Text Messages
To begin with, let’s delve into the essential feature of managing text messages. When you launch the app, it opens to the “Messages” section, displaying approximately the last ten text conversations. Click on any thread, and you’ll see an interface like this:
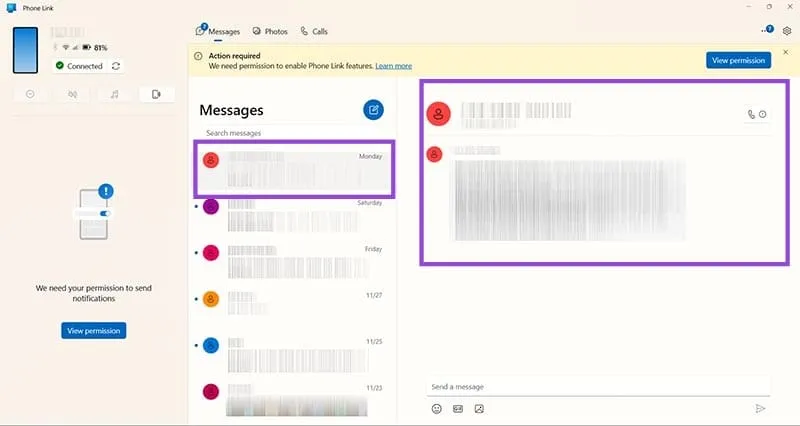
Notice the “Send a Message” area? It allows you to compose and dispatch text messages directly within the chat, just as you would on your mobile device.
If you’d like to initiate new text conversations, you can follow these straightforward steps:
Step 1: Click on the message icon situated next to the “Messages” label.
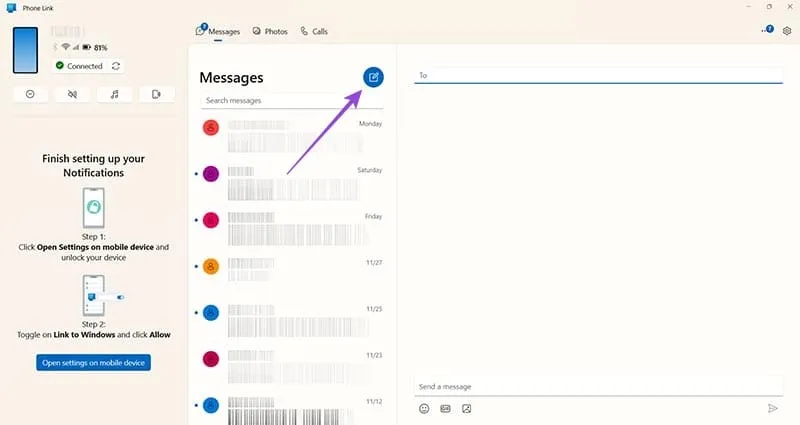
Step 2: In the provided text box on the right, input the name or number of a contact from your phone’s contacts. Click on the corresponding option to create a new text message thread.
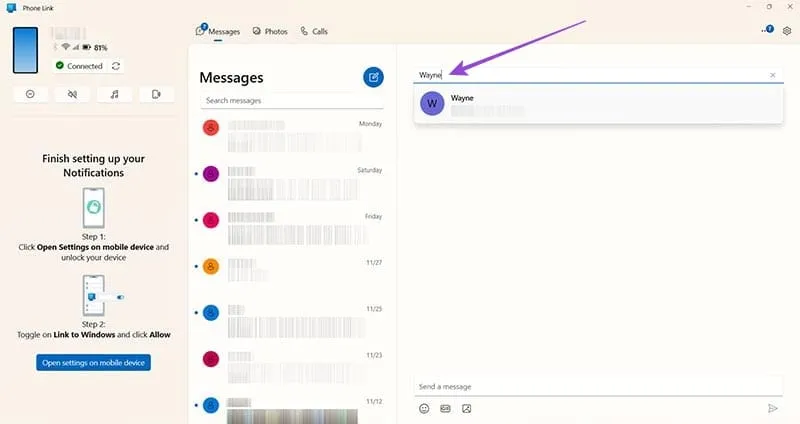
From this point onward, you can both send and receive messages via this PC interface. Best of all, this text conversation will sync to your phone, enabling you to continue your discussions wherever you are.
Feature 2: Import Photos from Your Smartphone
Phone Link facilitates the import of pictures from your phone’s gallery to your Windows device. Keep in mind that you can only access images taken specifically through Phone Link, meaning downloaded gallery images won’t be available without a stable connection.
Nevertheless, the process is quite user-friendly:
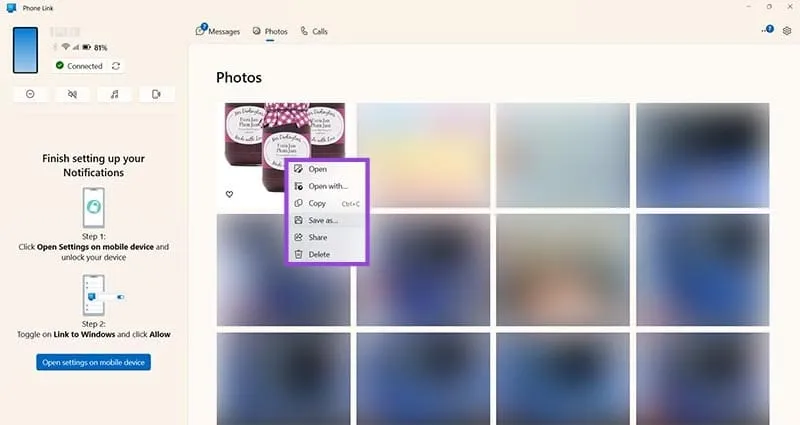
Step 1: Click on the “Photos” tab at the top to view your latest pictures from your phone within Phone Link.
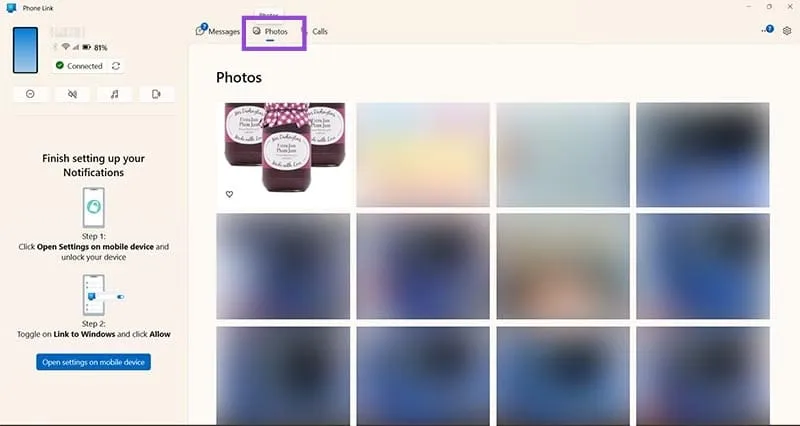
Step 2: Right-click the desired photo you wish to transfer to your Windows system, and choose from the available options in the context menu. You can easily copy the image to your device, save it, or even remove it from your phone using Phone Link.
Feature 3: Syncing Over Mobile Data
If you’re struggling with a poor Wi-Fi connection yet have robust mobile data, syncing your device with Phone Link could pose a challenge. However, there’s a practical workaround accessible within the Phone Link application.
Step 1: Click the gear icon in the top-right corner of the Phone Link interface to access “Settings.”
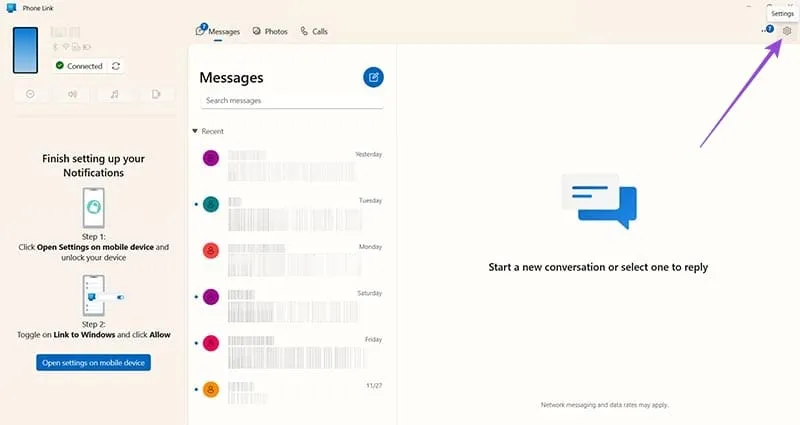
Step 2: Navigate to the “Features” section in settings and find the option labeled “Sync over mobile data” under the “Additional settings” section.
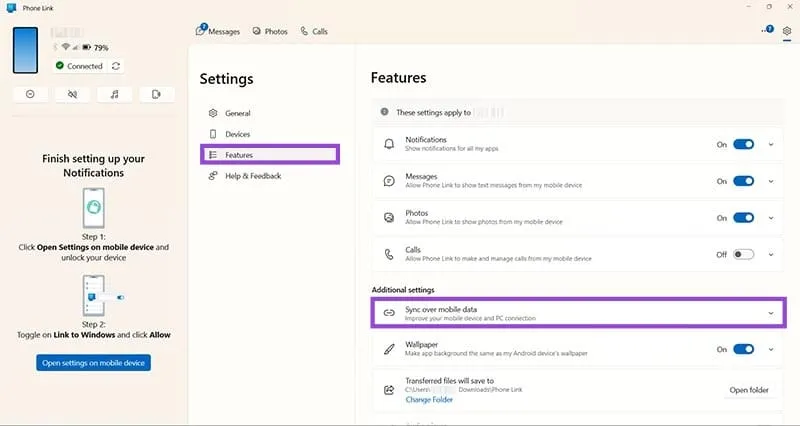
Step 3: Click the arrow next to “Sync over mobile data” and check the box that permits syncing while not connected to Wi-Fi.
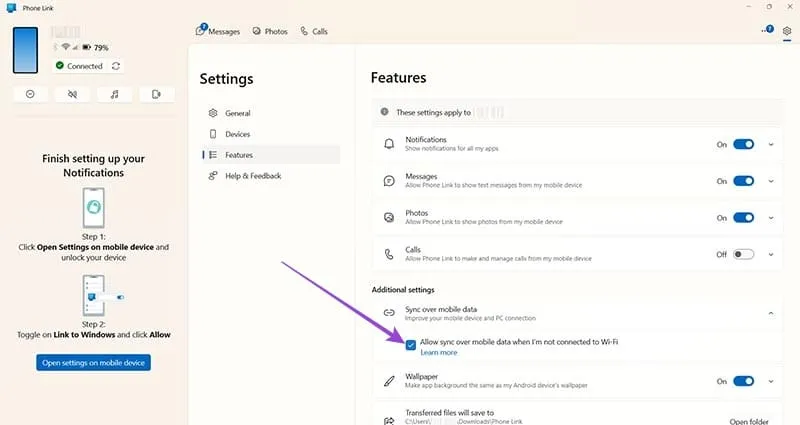
Now, your phone can sync seamlessly with the Phone Link application regardless of whether you’re utilizing Wi-Fi or relying solely on your mobile data.
Feature 4: Adjust Basic Phone Settings
This final feature may seem more like a novelty, but it is exciting to observe in action. Once Phone Link is set up, a series of basic phone status icons will display at the top-left corner of the screen. This includes standard indicators for volume, “Do Not Disturb” mode, battery status, and Wi-Fi connectivity.
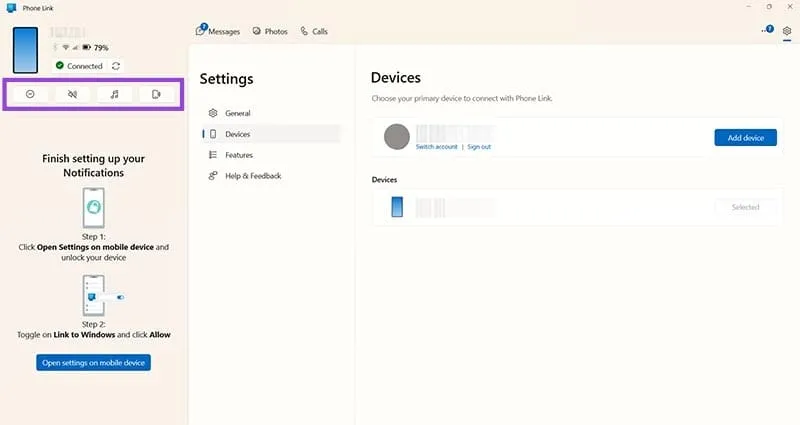
You can adjust these settings from your phone, and the changes will be reflected instantly in Phone Link. Observe what occurs when we modify the volume using the phone:
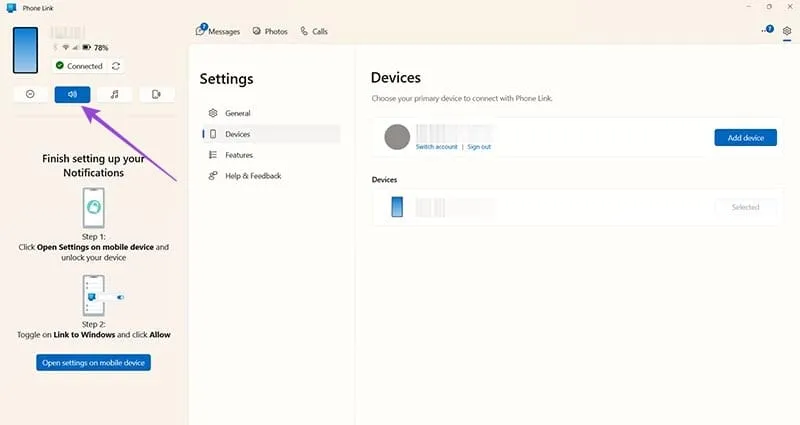
As the volume icon in Phone Link highlights, it mirrors the adjustments made on the phone. Additionally, you can also make adjustments directly through Phone Link, provided the app on your phone has been granted the necessary notification permissions, allowing for complete bidirectional control.