How to Connect Your Android Device to Windows 11: Two Effective Methods
Connecting your Android smartphone to your Windows 11 computer opens up a realm of exciting possibilities. Beyond the ability to transfer photos from your device’s gallery, you can also run applications, send messages, and view notifications in real time. Learning how to successfully link your Android to Windows will enhance your productivity.
Method 1: Utilize Phone Link
For those using a Windows 11 PC, the Phone Link app is likely pre-installed. Ensure your Android is operating on Android 7.0 or higher, which is generally achievable by keeping your device updated. Additionally, make sure both devices share the same Wi-Fi network to establish a successful connection.
Ready to get started? Follow these steps:
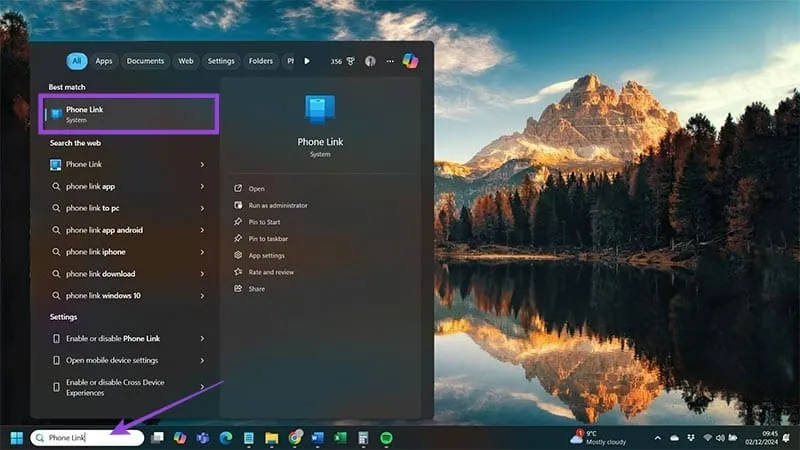
Step 1: In the search bar located on your taskbar, type in “Phone Link” and select the application from the results list.
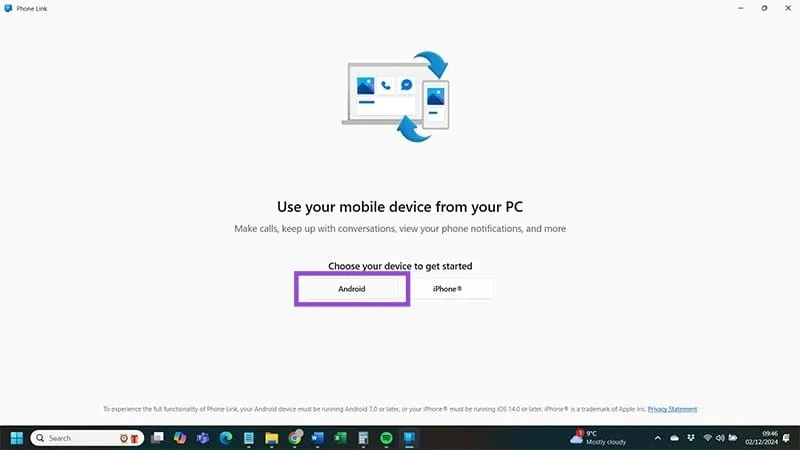
Step 2: You will be prompted to choose your device type. Click on “Android” for this setup.
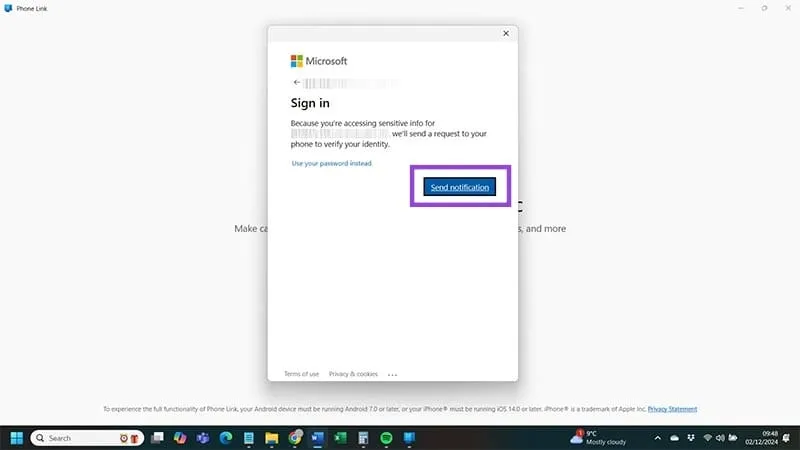
Step 3: Press the “Send notification” button to log into your Microsoft account via Phone Link, which will prompt a verification request on your phone.
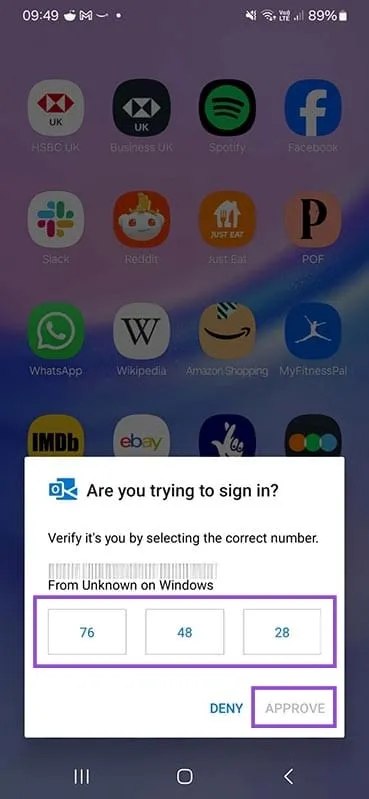
Step 4: After receiving a two-digit code on your Windows 11 PC, a notification will be sent to your Android. Tap the notification, select the matching number, and then hit “Approve.”
Step 5: Next, check your Windows device for a QR code. You may need a QR code scanner app on your Android to scan this code.
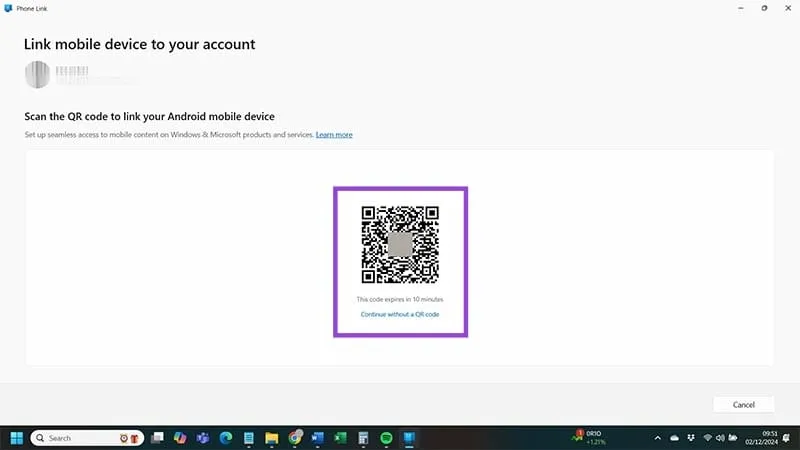
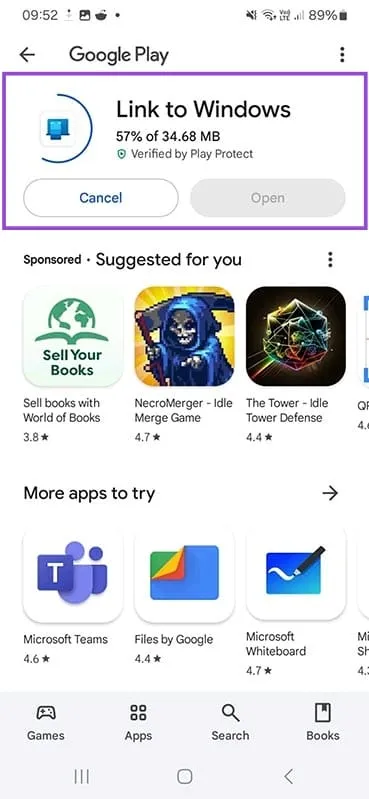
Step 6: When prompted, download “Link to Windows” on your Android device and press “Continue.”
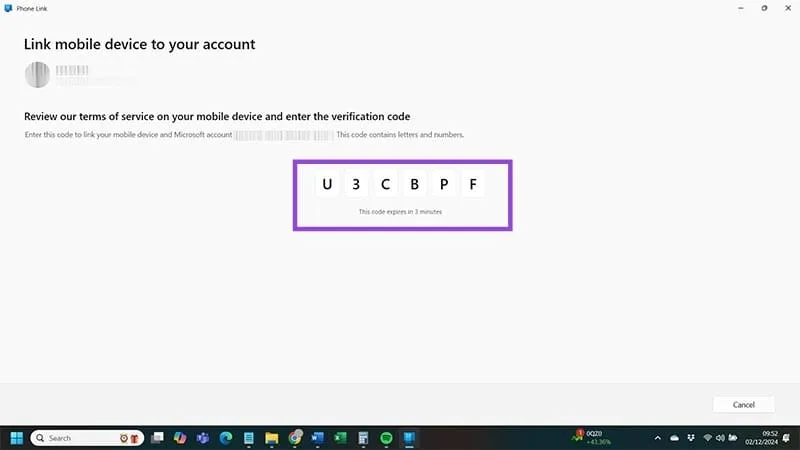
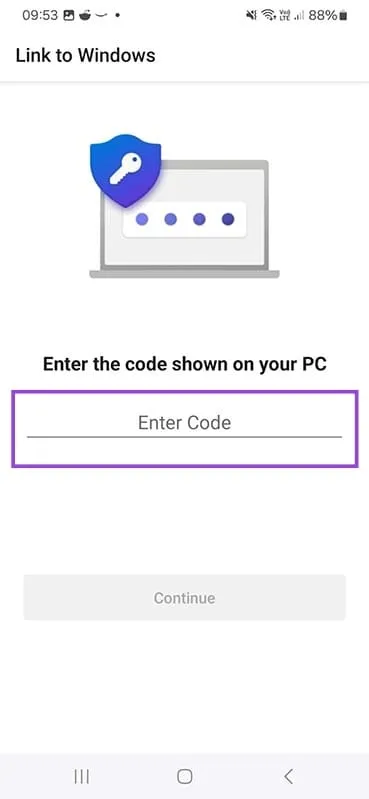
Step 7: Your Windows 11 device will display another code. Input this code into your Android device as prompted.
Step 8: Afterwards, go through any permission requests from “Link to Windows.” You have the flexibility to grant Phone Link minimal or extensive access depending on your preference. Once done, click the “Done” button on your Android.
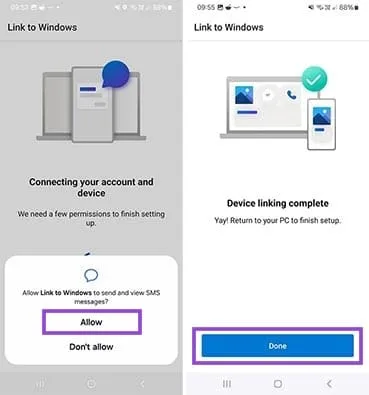
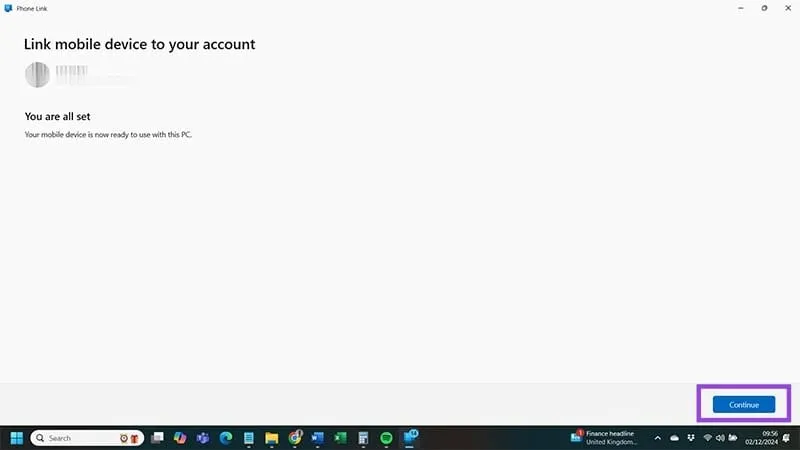
Step 9: Congratulations! Complete the process by clicking the “Continue” button, successfully linking your Android to your Windows 11 PC via Phone Link.
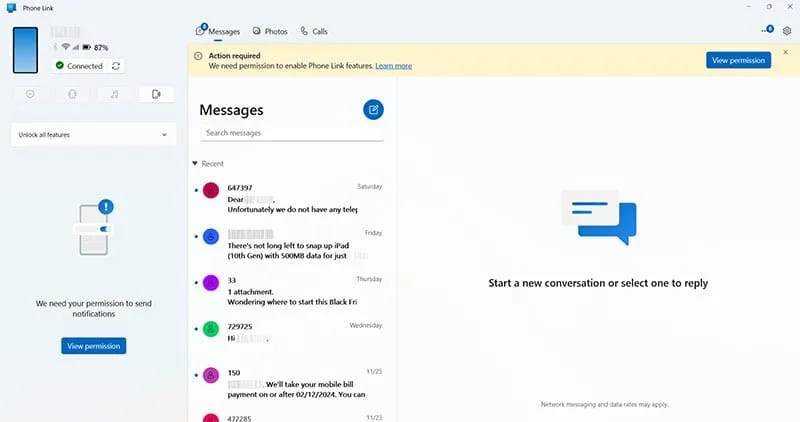
Method 2: Connect Using a USB Cable
If you’re looking for a simpler connection without fully integrating your Android and Windows devices, using a USB cable may be the ideal solution. This allows for basic file transfers without the clutter of notifications. Your standard charging cable should suffice.
Step 1: Unlock your Android device using your preferred security method, whether it’s a PIN, fingerprint, or another option.
Step 2: Connect one end of your USB cable to your Android device and the other end to your Windows PC.
Step 3: When a notification appears in the bottom-left corner of your screen, click on “Select what happens with this device.”
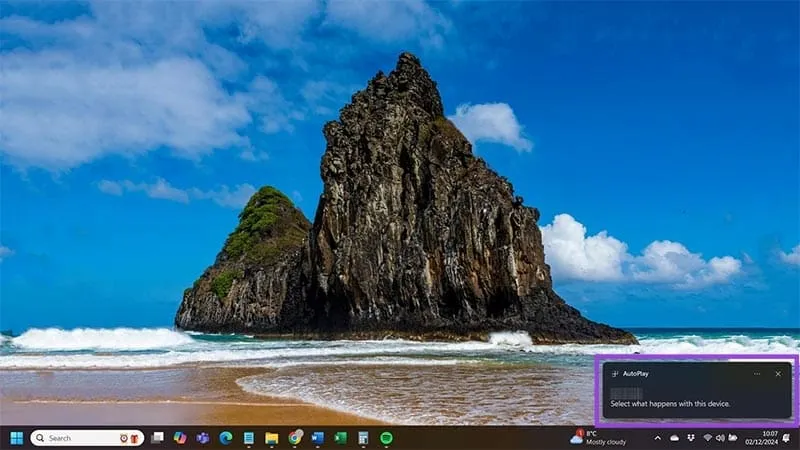
Step 4: With the connection established, choose your desired action from the options shown in the top-right corner of your screen. If you want to view files, select “Open device to view files” or opt to import your media and photos to your OneDrive account.
Step 5: Your connected Android device should also be visible under “This PC” in File Explorer. Please note that you will only be able to access files you’ve permitted when initially connecting your Android to your Windows 11 device.