Solving Windows 11 Installation Error Code 0xc1900101: A Complete Guide
Important Highlights
- Encountering the Windows 11 Installation Error 0xc1900101 could stem from obsolete drivers, conflicts with third-party antivirus software, or an outdated BIOS.
- To resolve this error, consider disconnecting unnecessary hardware, disabling any third-party antivirus, updating your drivers, confirming adequate storage space, and conducting SFC and DISM scans.
- If problems persist, consider upgrading to Windows 11 using an ISO file to bypass the installation errors.
Experiencing the Windows 11 Installation Error 0xc1900101? This widespread problem can hinder your upgrade to Windows 11. Often attributed to outdated drivers, conflicts with third-party antivirus programs, or old BIOS, we’ll discuss effective solutions to help you through this error so you can successfully install Windows 11.
Troubleshoot Installation Error 0xC1900101 in Windows 11
This guide will walk you through the steps to rectify the 0xc1900101 installation error in Windows 11.
Disconnect Extra Hardware
Often, additional devices connected to your computer may contribute to the occurrence of the Windows 11 installation error 0xc1900101. Start by removing all unnecessary peripherals such as USB sticks, external drives, and audio devices. Once these devices are disconnected, attempt the Windows 11 update again. Should this not resolve the issue, proceed to the next troubleshooting step.
Turn Off Third-Party Antivirus
Your third-party antivirus software might be causing the installation issue as well. Disable this software temporarily to see if it resolves the problem. If the issue persists, you may need to uninstall the antivirus, then retry upgrading to Windows 11.
Update Your Drivers
Updating your drivers is another crucial step. Head over to the official website of your hardware manufacturer to download the latest driver package. For laptops, check your specific brand’s website for compatibility.
Alternatively, tools like Driver Booster or DriverPack Solution can simplify the driver update process, allowing for hassle-free updates.
Check Storage Space
Insufficient storage space can also lead to installation errors. Make sure your PC has at least 64GB of available space to facilitate the installation of Windows 11. Verify that sufficient space exists on a single partition.
Conduct SFC And DISM Scans
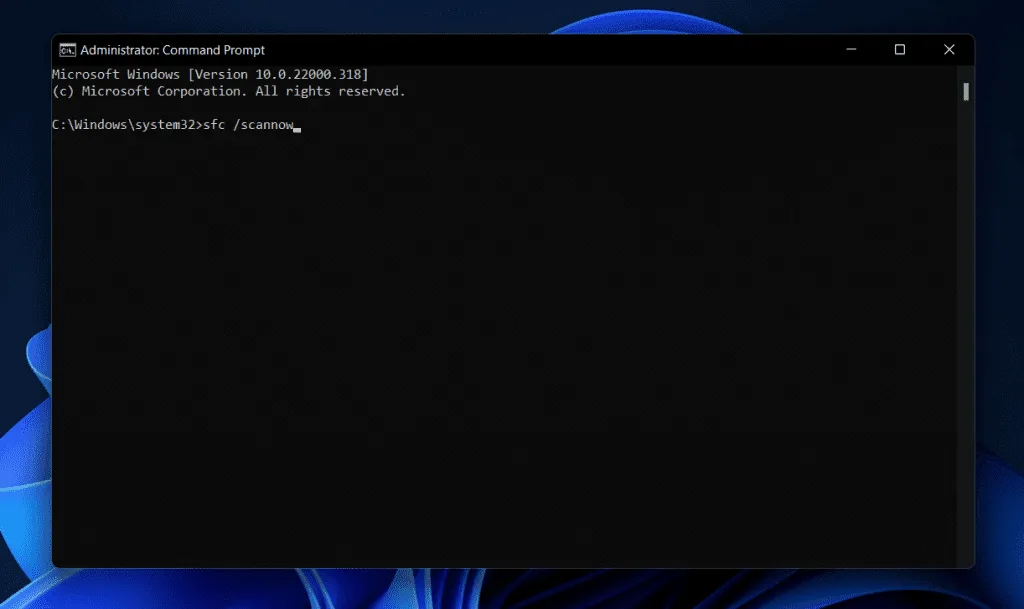
If the error persists, executing an SFC (System File Checker) scan may help. This tool inspects and repairs corrupt files or cached data. To perform an SFC scan, follow these steps:
- Access the Start Menu by pressing the Windows key.
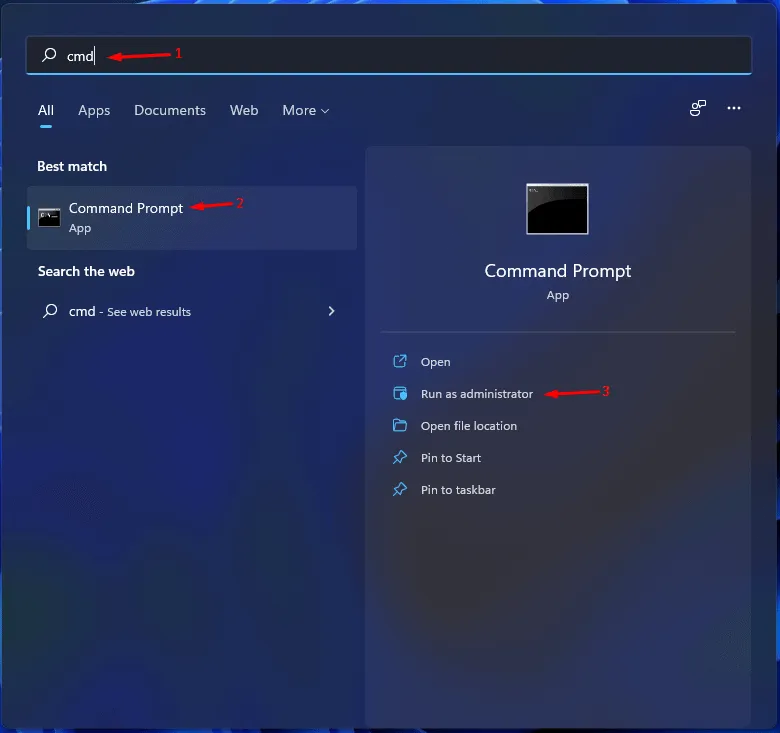
- In the Start Menu, type Command Prompt, right-click on it, and choose Run as administrator.

- In the Command Prompt, enter SFC /scannow and press Enter to begin the scan.

- Wait for the scan to finish, then close the Command Prompt and restart your computer.
- This process should ideally resolve the error.
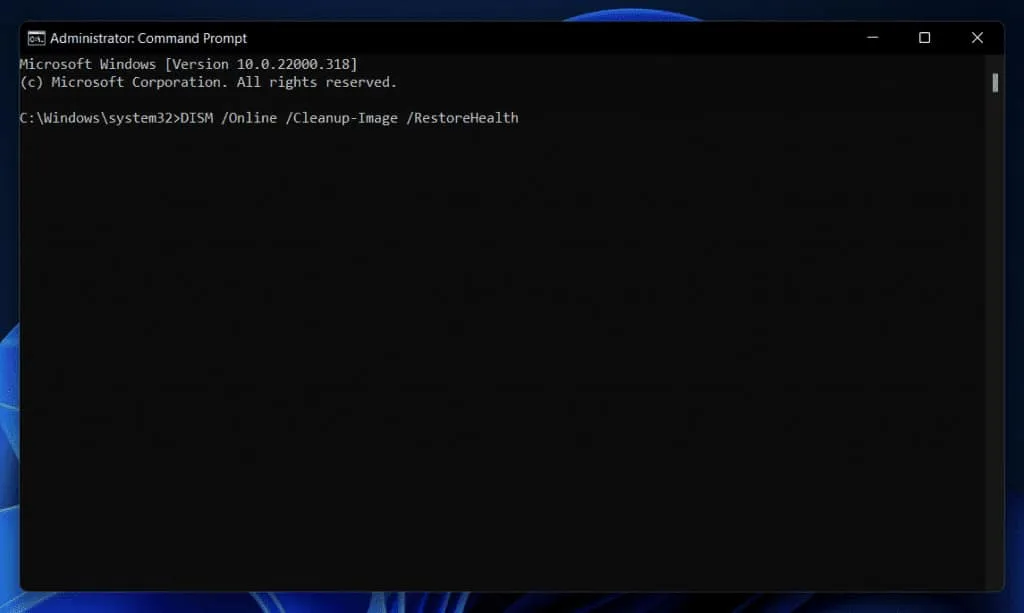
If the SFC scan does not fix the issue, consider running a DISM (Deployment Image Servicing and Management) scan by following these steps:
- Run Command Prompt as an administrator, as outlined above.
- Type and execute the command:
Dism /Online /Cleanup-Image /RestoreHealth.

- Allow the process to complete, and the issue should now be resolved.
Update Your BIOS
An outdated BIOS can also trigger this error. To rectify it, you need to update your BIOS, following the specific instructions laid out in your motherboard’s manual. You may also find relevant procedures online based on your motherboard model.
Conclusion
This guide provides detailed steps to address the Windows 11 installation error 0xc1900101 you may encounter. By following the above recommendations, you should be able to successfully resolve the issues hindering your upgrade.