Step-by-Step Guide to Mass Deleting Emails in Apple Mail
Bulk Delete Emails on iPhone and iPad
Let’s go through the process of deleting emails in bulk using the Mail app on your iPhone or iPad. Make sure you have the most recent version of the app to ensure a smooth experience while executing these steps.
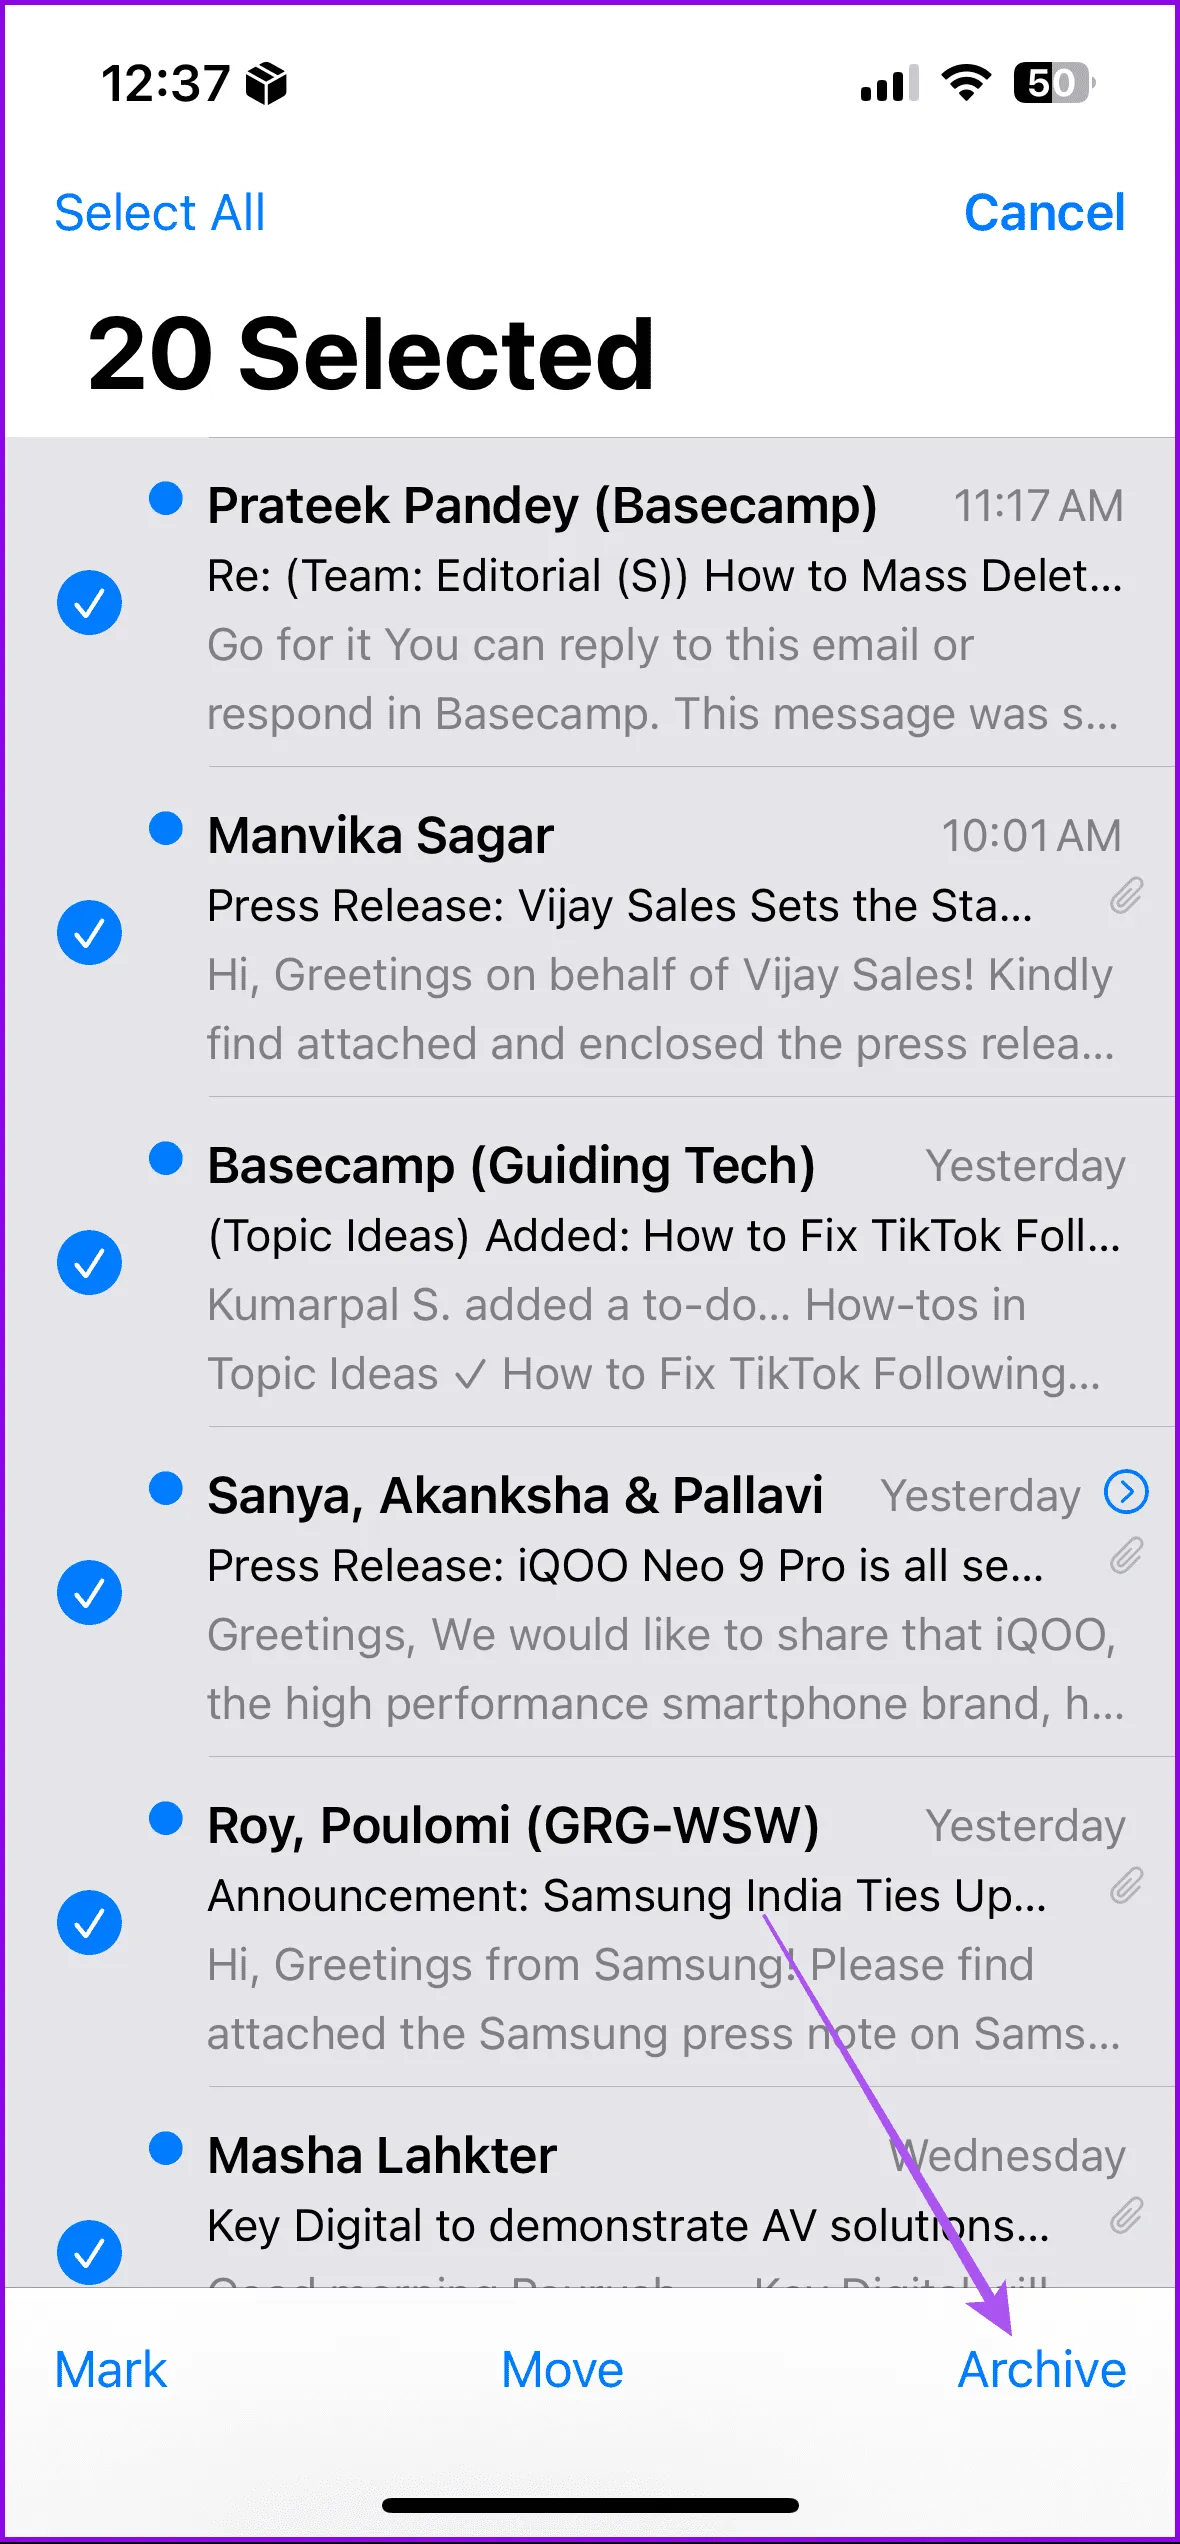
Step 1: Launch the Mail app and tap on Edit located in the top-right corner.
Step 2: Select the specific emails you wish to delete.
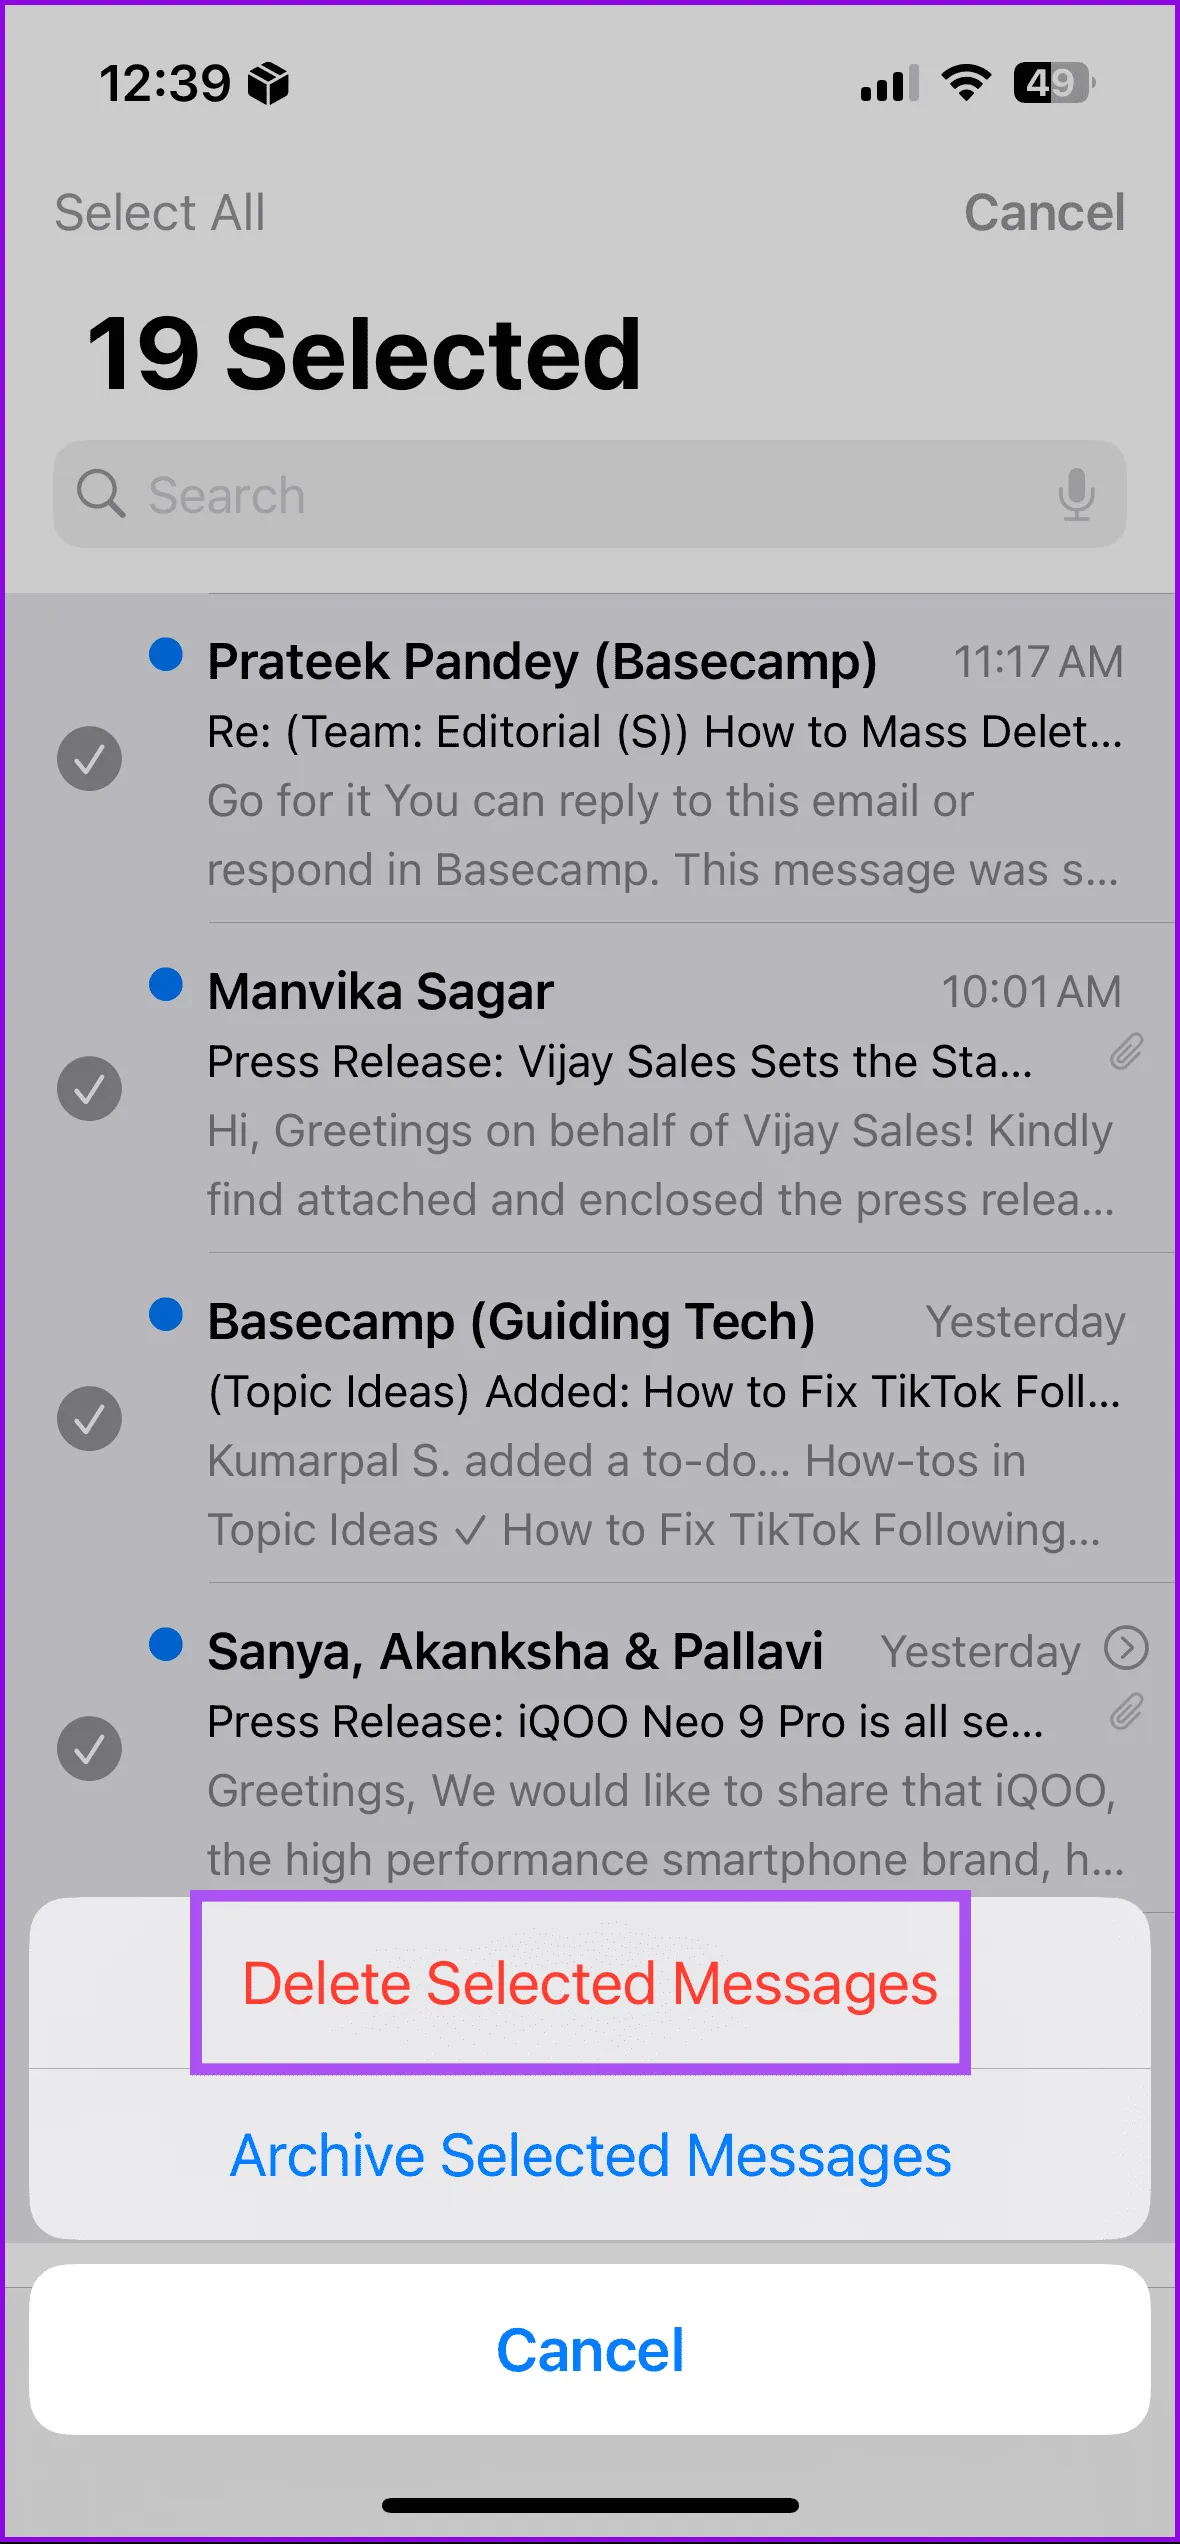
Step 3: Long-press the Archive button at the bottom-right corner, then choose Delete Selected Messages.
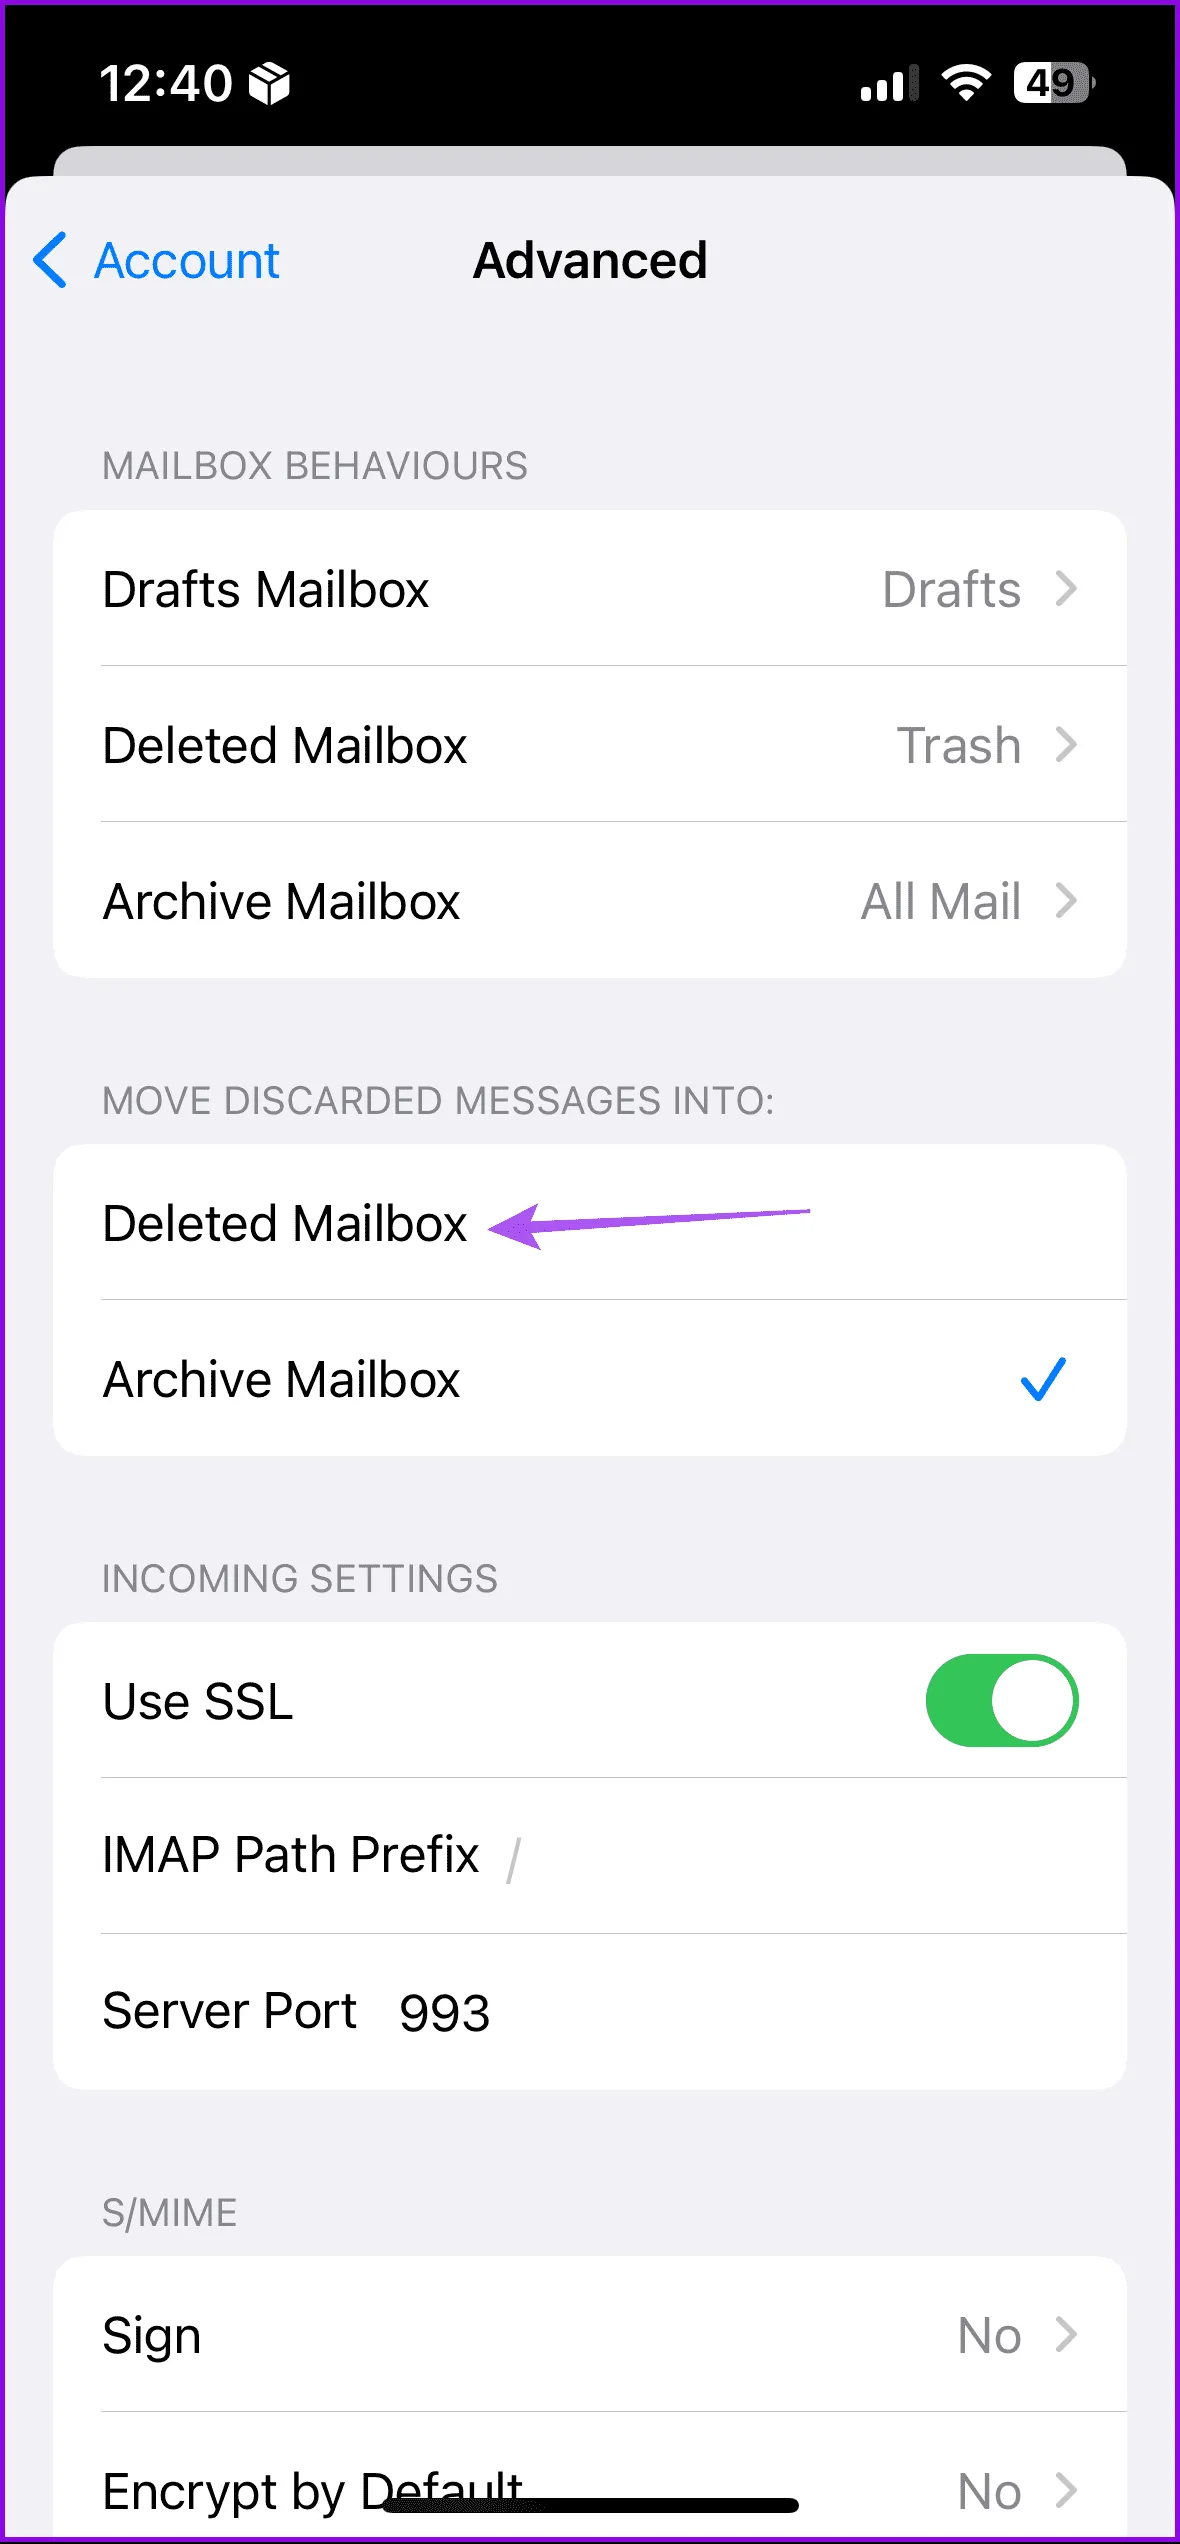
If you prefer to delete emails directly rather than archiving them, follow the steps below to set deletion as the default action on your device.
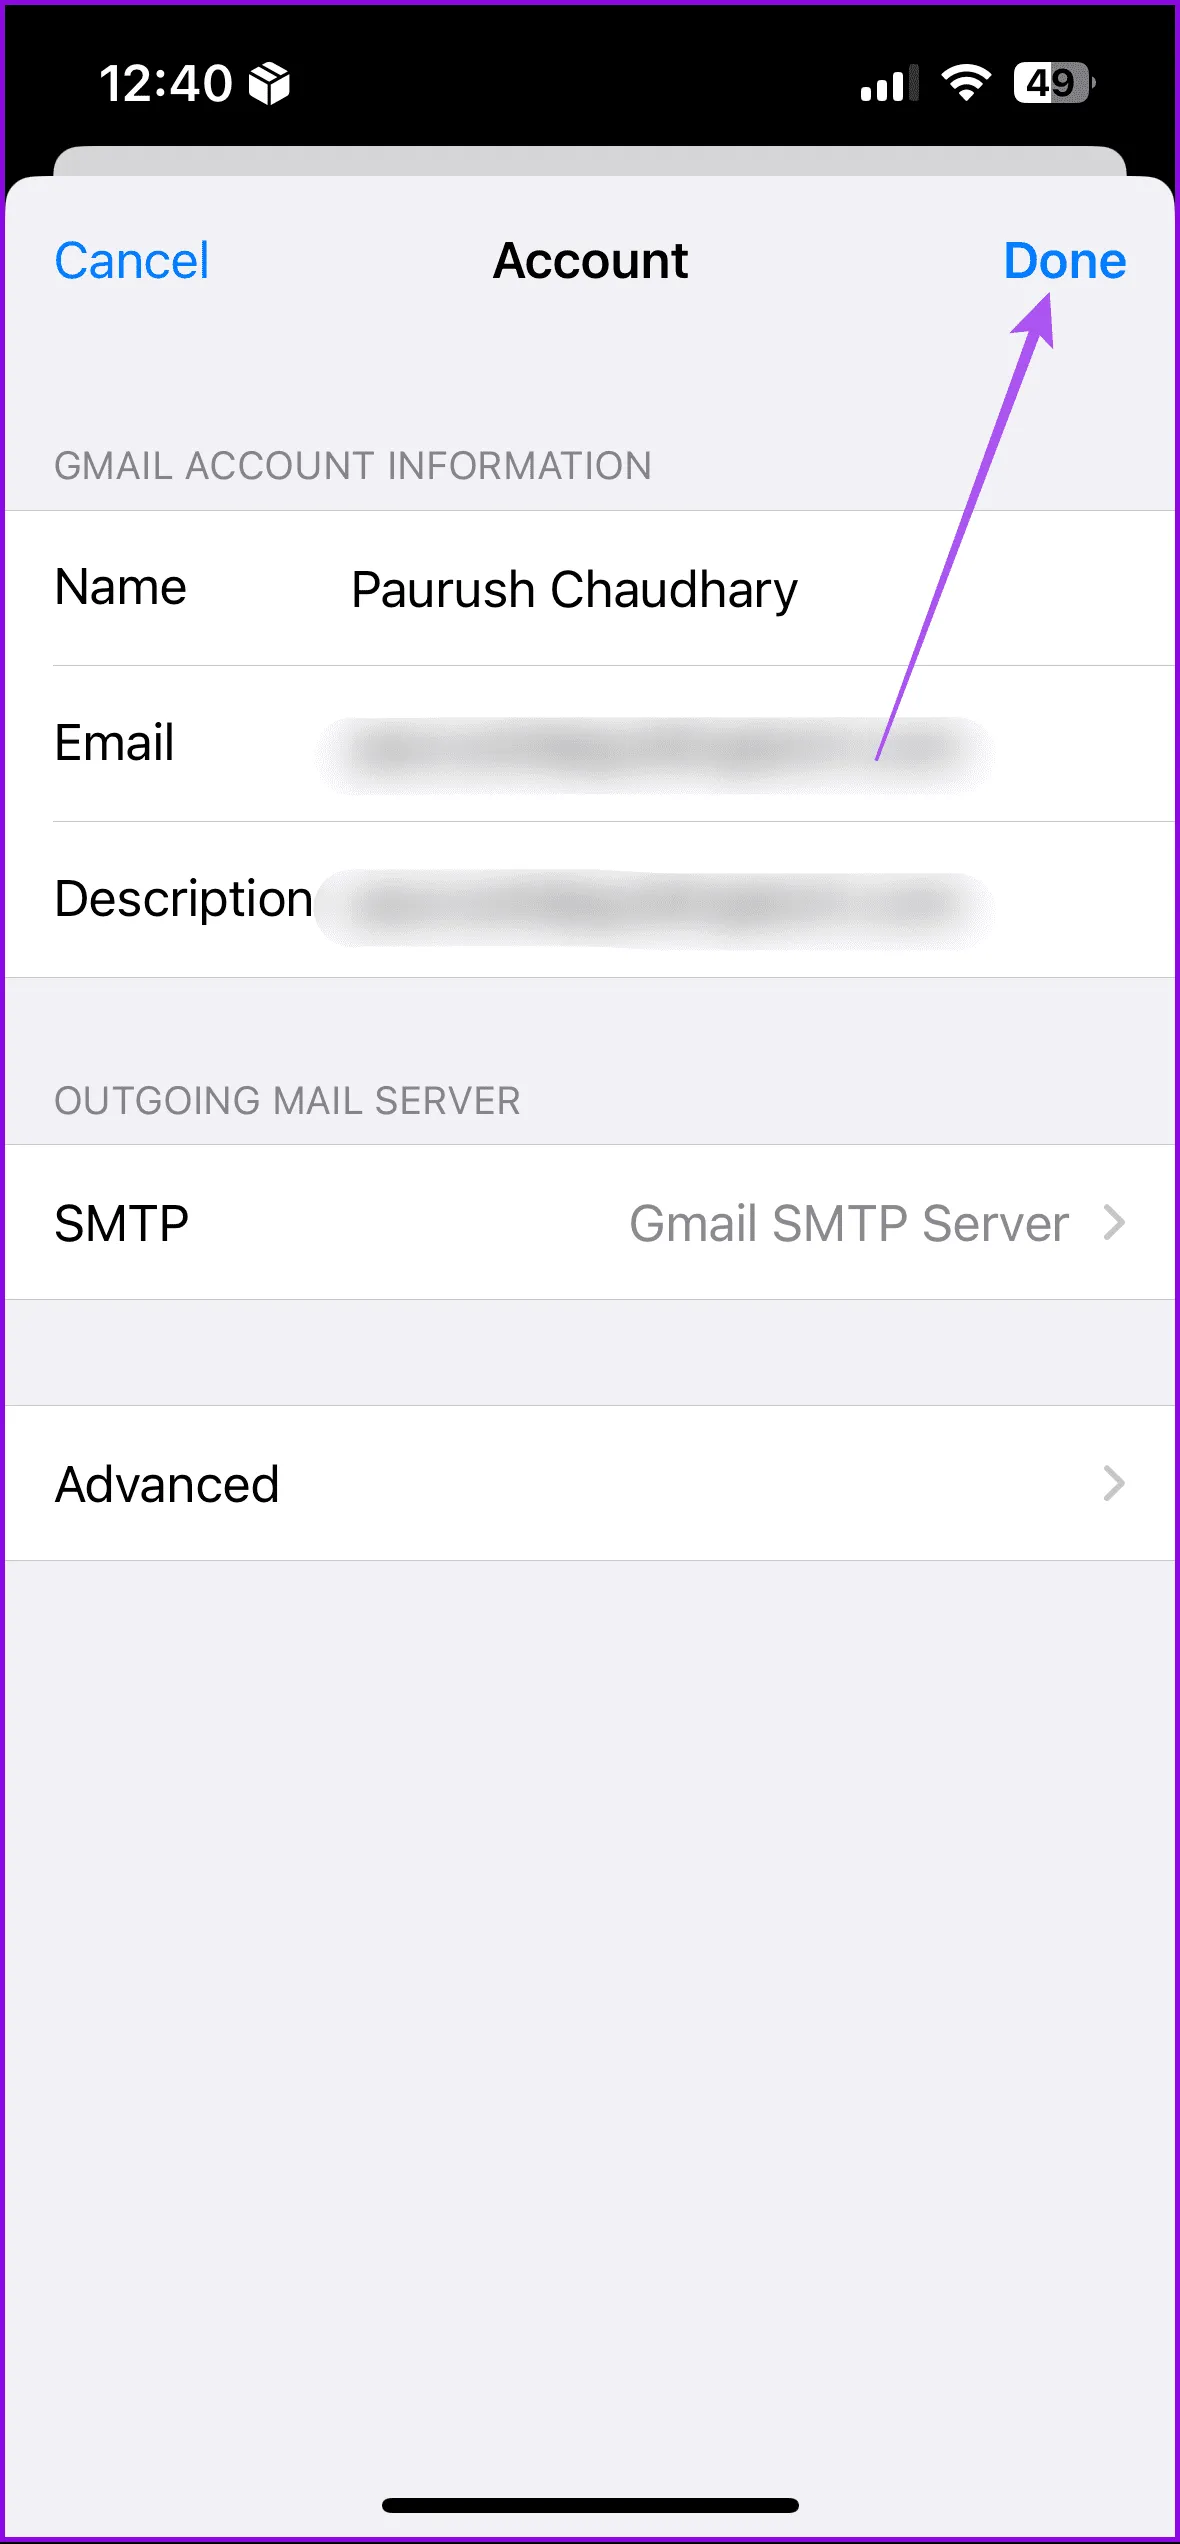
Step 1: Navigate to Settings > Mail > Accounts > Tap your email account > Advanced.
Step 2: Select Deleted Mailbox. Then navigate back to the Accounts page and tap Done at the top-right corner.
Bulk Delete Emails on Mac
If your preferred method for managing emails is via the Mail app on your Mac, here are the steps for mass deletion.
Step 1: Open the Mail application.
Step 2: Utilize the Shift and Down Arrow keys to highlight the emails you wish to delete. Alternatively, you can press Command + A to select every email if you want to empty your inbox entirely.
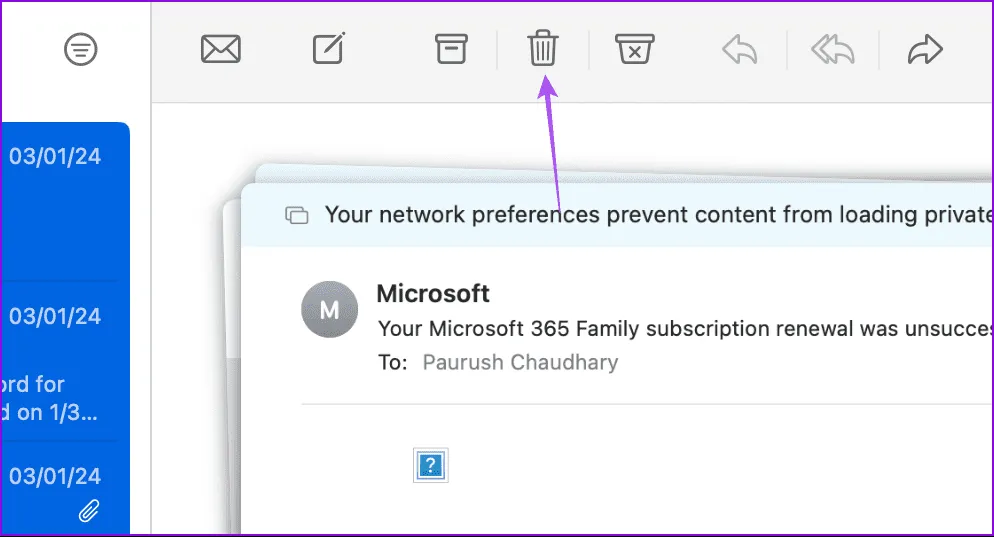
Step 3: Click on the Delete icon located at the top right corner.
For further assistance, refer to our articles if you experience issues syncing your Gmail or Outlook accounts with the Mail app.
Remove All Emails from a Single Sender in Apple Mail
On iPhone and iPad
Step 1: Open the Mail app and search for the sender’s name.
Step 2: After the emails from that sender appear, tap on Edit and select the emails you want to delete.
For efficiency, you can swipe down through the checkboxes until you reach the bottom of the list.
Step 3: Tap the Delete icon at the bottom.


On Mac
Step 1: Open the Mail application on your Mac and look for the sender’s name.
Step 2: When the emails from that sender are displayed, press Command + A to select all of them, then click the Delete icon.

Image Credits: Guidingtech.com