Top 5 Solutions to Resolve Windows 11 Keyboard Not Working Issue
Essential Insights
- Many users face keyboard malfunctions in Windows 11, often due to driver failures and system errors, affecting daily tasks.
- Checking the keyboard’s functionality and adhering to the outlined steps carefully is crucial for troubleshooting the keyboard not responding issue in Windows 11.
Microsoft has introduced Windows 11 as its latest operating system, which, while generally stable, isn’t entirely free from common issues. The keyboard plays a vital role in PC operation, and there can be instances where it becomes unresponsive. Historically, Windows has encountered problems that cause peripheral devices to disconnect, primarily stemming from driver issues and software errors. Fortunately, various solutions exist to fix keyboard problems in Windows 11, and we are here to guide you through them.
Resolve Keyboard Not Functioning in Windows 11
As an upgrade from Windows 10, Windows 11 retains several of the previous version’s quirks. You need not struggle with the computer to troubleshoot; instead, a few straightforward checks can help identify the issue. First, it’s essential to verify that the keyboard itself isn’t defective. Testing it on another device can help confirm its functionality. Here are some common reasons keyboards may malfunction in Windows 11:
- Driver-related issues
- Problems with the USB port
- Recent operating system updates
- Defective hardware
Allow me to guide you through some simple yet effective fixes, followed by advanced troubleshooting strategies for addressing keyboard issues in Windows 11.
Reboot Your Windows 11 PC
Instead of disconnecting the keyboard, restart your computer to clear temporary files and initiate a fresh session. A reboot prompts Windows to reload necessary drivers, which can effectively resolve the problem.
Step 1: Press the “Start” button on your keyboard.
Step 2: Locate and click the power icon in the lower left corner.
Step 3: Select “Restart” from the available options.
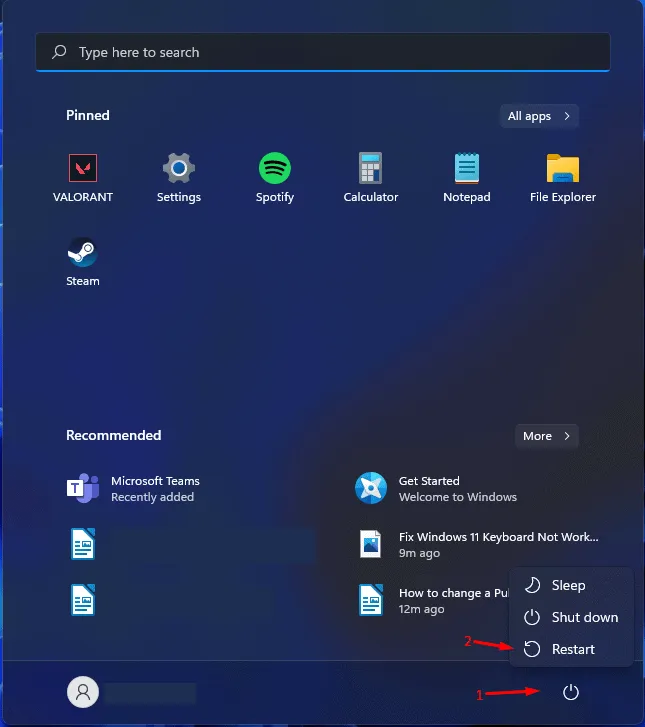
Step 4: Your computer will proceed to restart.
Before restarting, ensure that all work is saved and tabs are closed to avoid losing important information. Don’t underestimate the power of a reboot; it can often resolve many issues swiftly.
Try a Different USB Port
Most Windows PCs offer several USB ports. If you’re short on time and want a quick fix without rebooting, consider connecting the keyboard to a different USB port. I encountered a similar issue recently and found that moving my keyboard to another port resolved it immediately.
This is a straightforward solution that anyone can implement. I had never used that particular USB port before, so the keyboard drivers were successfully installed anew. Always choose a port that hasn’t been occupied previously.
Remove Keyboard Drivers
While some high-end keyboards come with special software for functionality customization, many basic keyboards do not require additional software. In such cases, consider uninstalling the existing drivers and reconnecting the keyboard to prompt a reinstallation.
Step 1: Disconnect the keyboard from your computer.
Step 2: Click the “Start” button and open “Settings.”
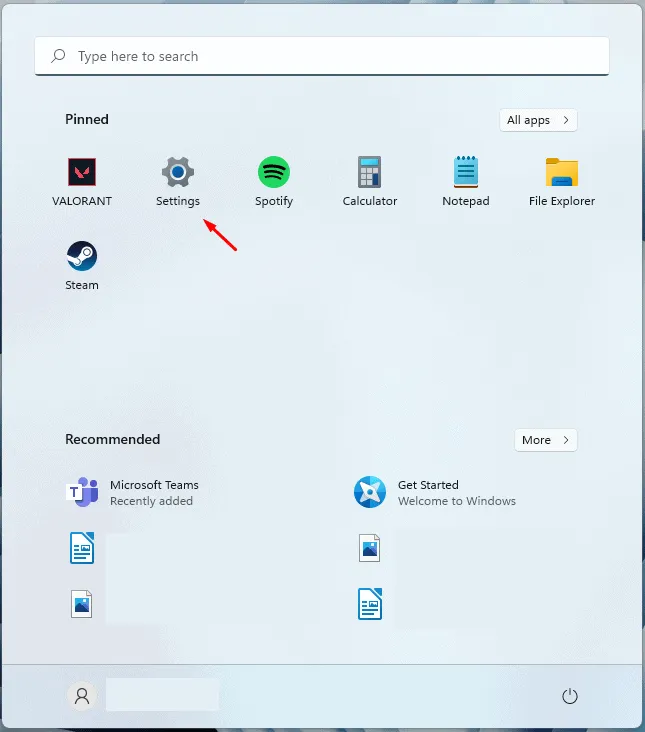
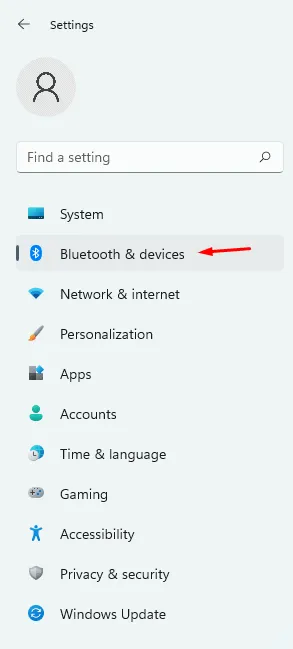
Step 3: Select “Bluetooth & Devices” to proceed.
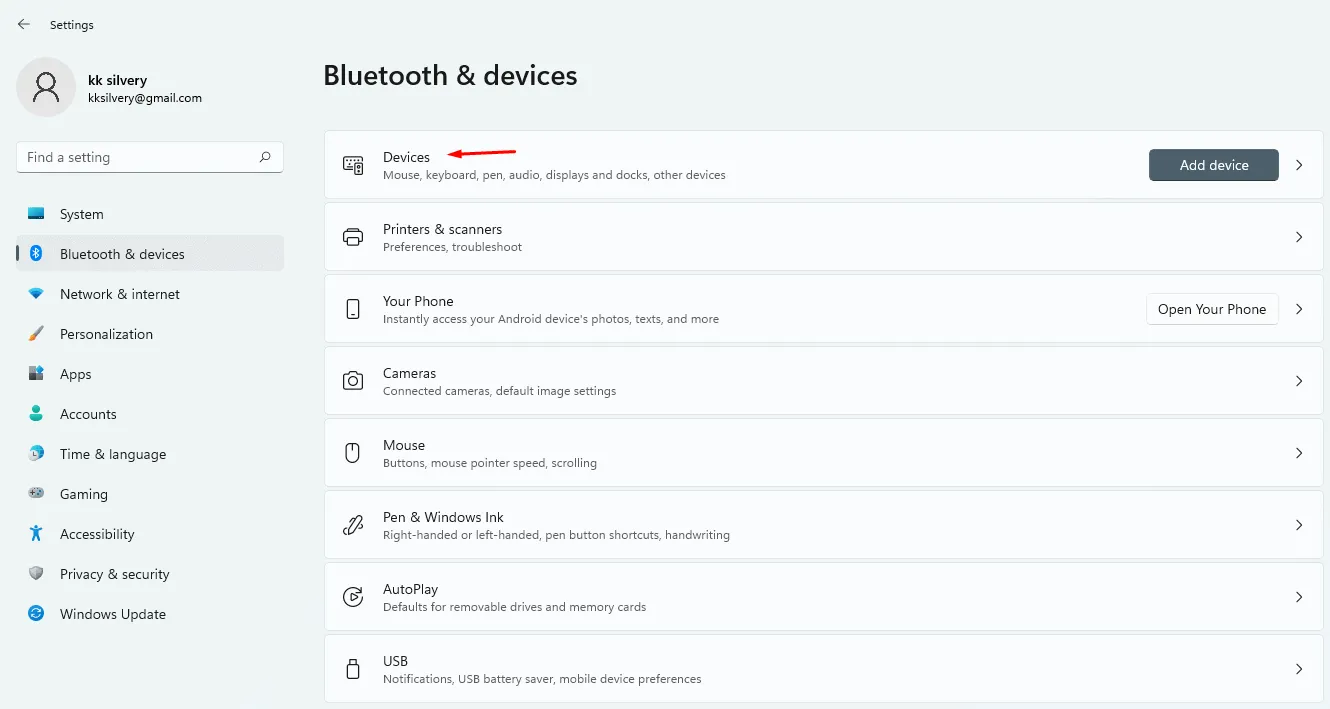
Step 4: Choose “Devices” next.
Step 5: Locate the keyboard drivers listed under “Input.”

Step 6: Click the three-dot menu icon to access more options.

Step 7: Select “Remove device.”

Afterward, restart your computer and reconnect the keyboard to let Windows install the necessary drivers. While it’s also possible to uninstall drivers via Device Manager, using the Settings app is generally more convenient.
Edit Registry Values
Keyboard issues are frequently tied to driver malfunctions or kernel problems in your system. Before modifying the registry, ensure you verify the condition of the peripheral and try the previously suggested fixes.
Step 1: Click the “Windows” icon to start the process.
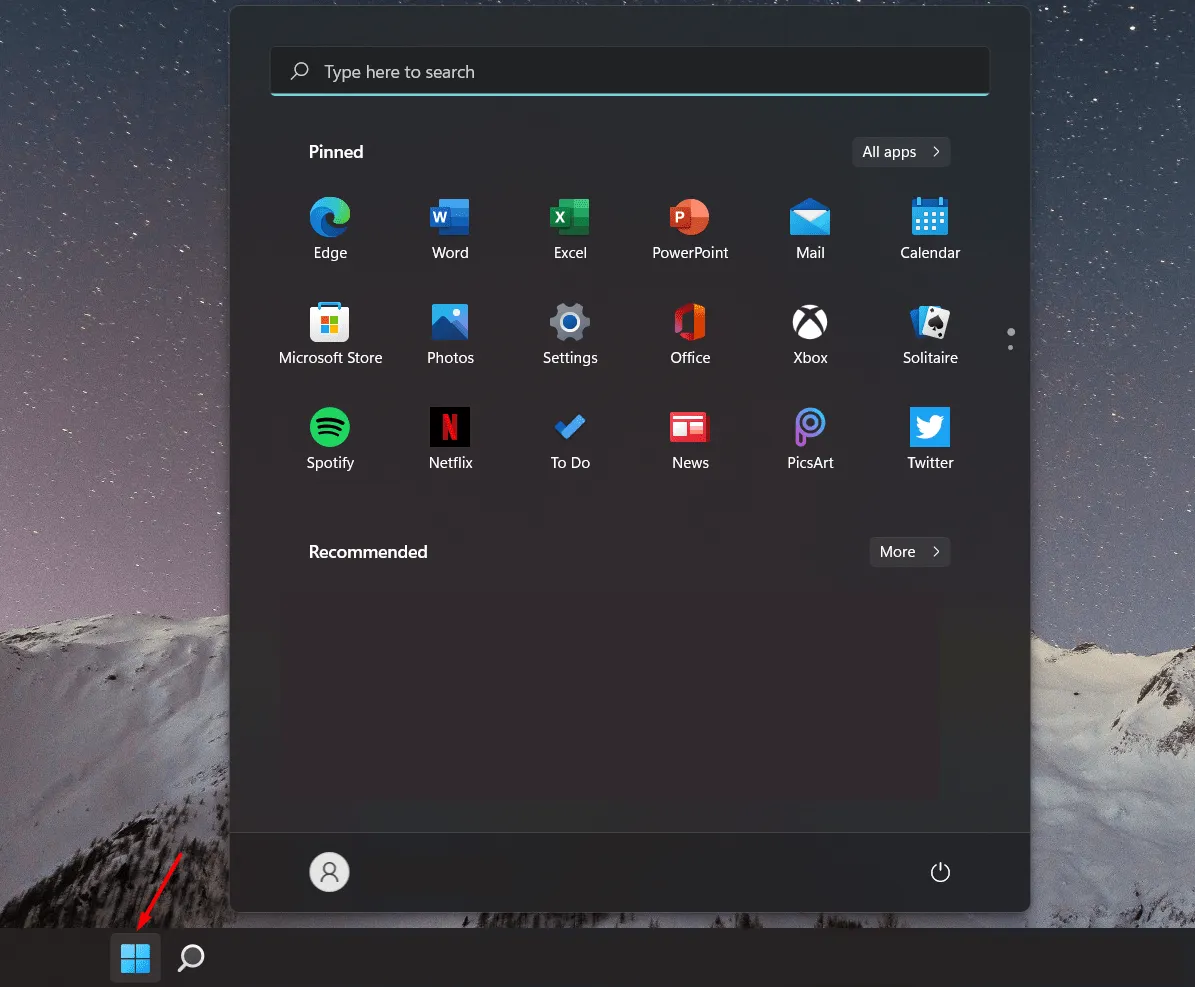
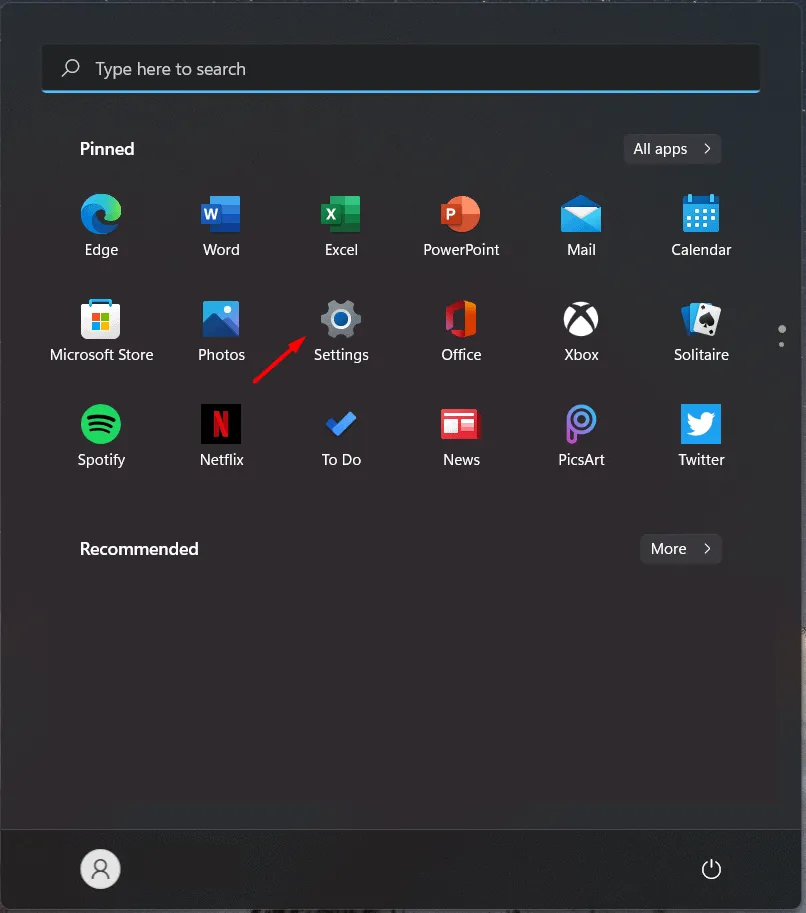
Step 2: From the “Best Match” results, select “Settings.”
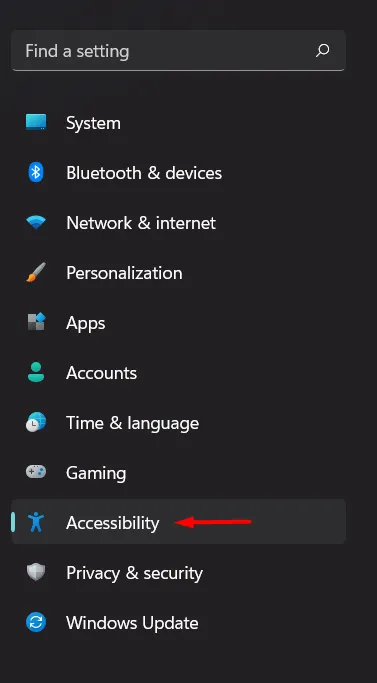
Step 3: Choose “Accessibility” from the navigation panel.
Step 4: Scroll down and select “Keyboard” under the “Interaction” section.

Step 5: Enable the “On-screen Keyboard.”

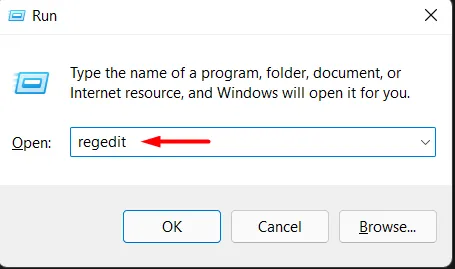
Step 6: Press the Windows key, then type “Run” and hit enter.

Step 7: Input “regedit” and press Enter.

Step 8: The Registry Editor will open.
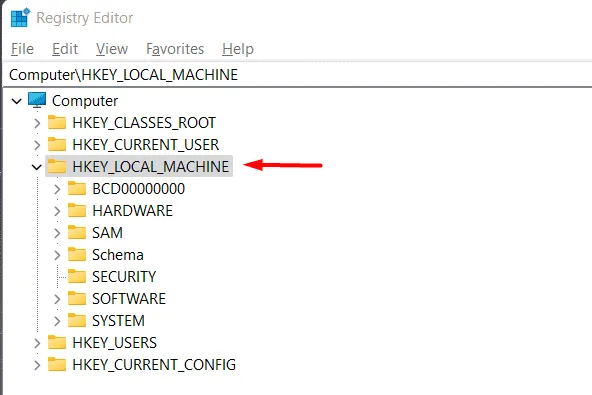
Step 9: From the left side, click and select “HKEY_LOCAL_MACHINE.”

Note: “HKEY_LOCAL_MACHINE” is located on the left sidebar.
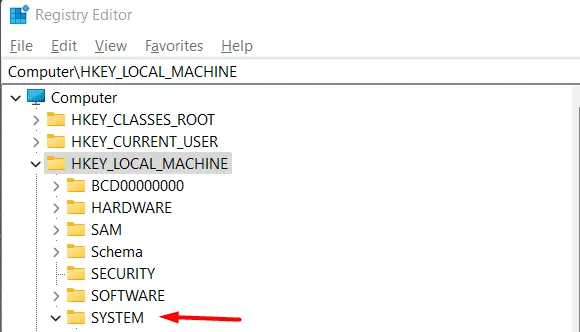
Step 10: Click on the “System” option within “HKEY_LOCAL_MACHINE.”
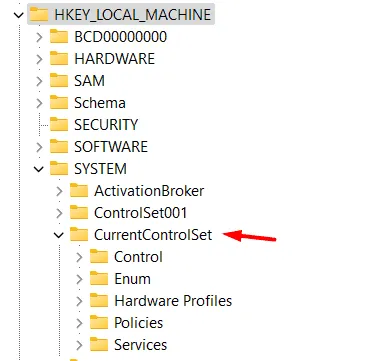
Step 11: Proceed to select “CurrentControlSet” in the “System” section.
Step 12: Within “CurrentControlSet,” click on “Services.”
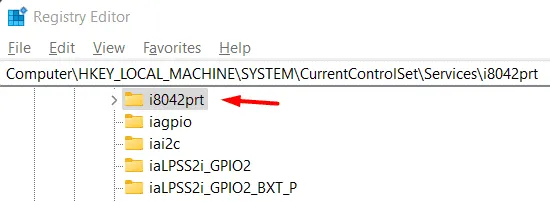
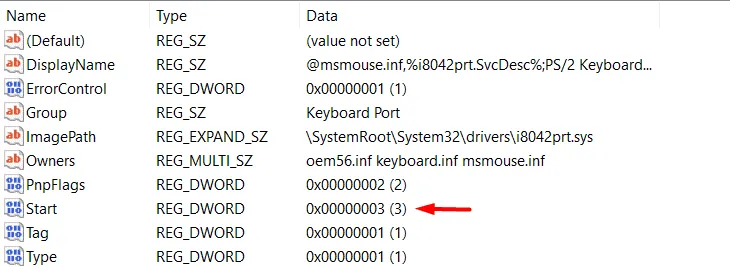
Step 13: Select the “i8042prt” option from the Services menu.

Step 14: Double-click on “Start.”
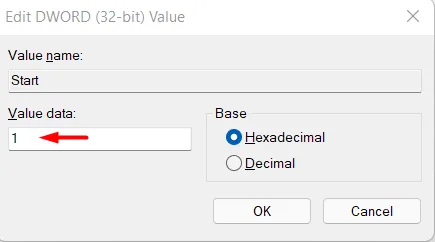
Step 15: Set the value data to “1” and click “OK.”
Note: A pop-up will appear with the title “Edit DWORD (32-bit) Value.”
Step 16: Ensure that the value is set to “1.”
No need to worry about potential negative impacts on your PC from this change, as you can always revert it by following the above instructions again.